[Facebook Ads] How to create a Facebook Ad: Part 2
Part 2 of this article is about how to create a Facebook Ad. If you haven’t read part 1 you can do so here. Before you carry on reading you should have done your customer and competitor research, crafted your messaging, and built your landing pages. All of this needs to be congruent to creating your Facebook Ad. Like any other PPC strategy, Facebook Ads is a quicker way of generating brand awareness, leads and customers. If done correctly it can skyrocket your business. However, as it requires money not everyone is willing to do it. Regardless of whether you use it or not, it’s still very important to understand from a marketing point of view.
Creating a Facebook Ad comes down to going into your Ads manager and deciding what objective you want to use. In this case, it could be Lead Ad or conversion Ad, and then setting up the targeting, scheduling and budgeting options at Ad set level. In addition to this, setting up the Ad copy, headline graphic and Ad id information at the Ad level. It’s important to remember to do one Ad per Adset, and test for 1 – 2 weeks on a low budget per day to observe results. Split testing one interest per Adset could help you understand what performs well and what doesn’t. Finally, you want to make sure your pixel is installed properly on each page of your website and landing pages.
Thank You Pages
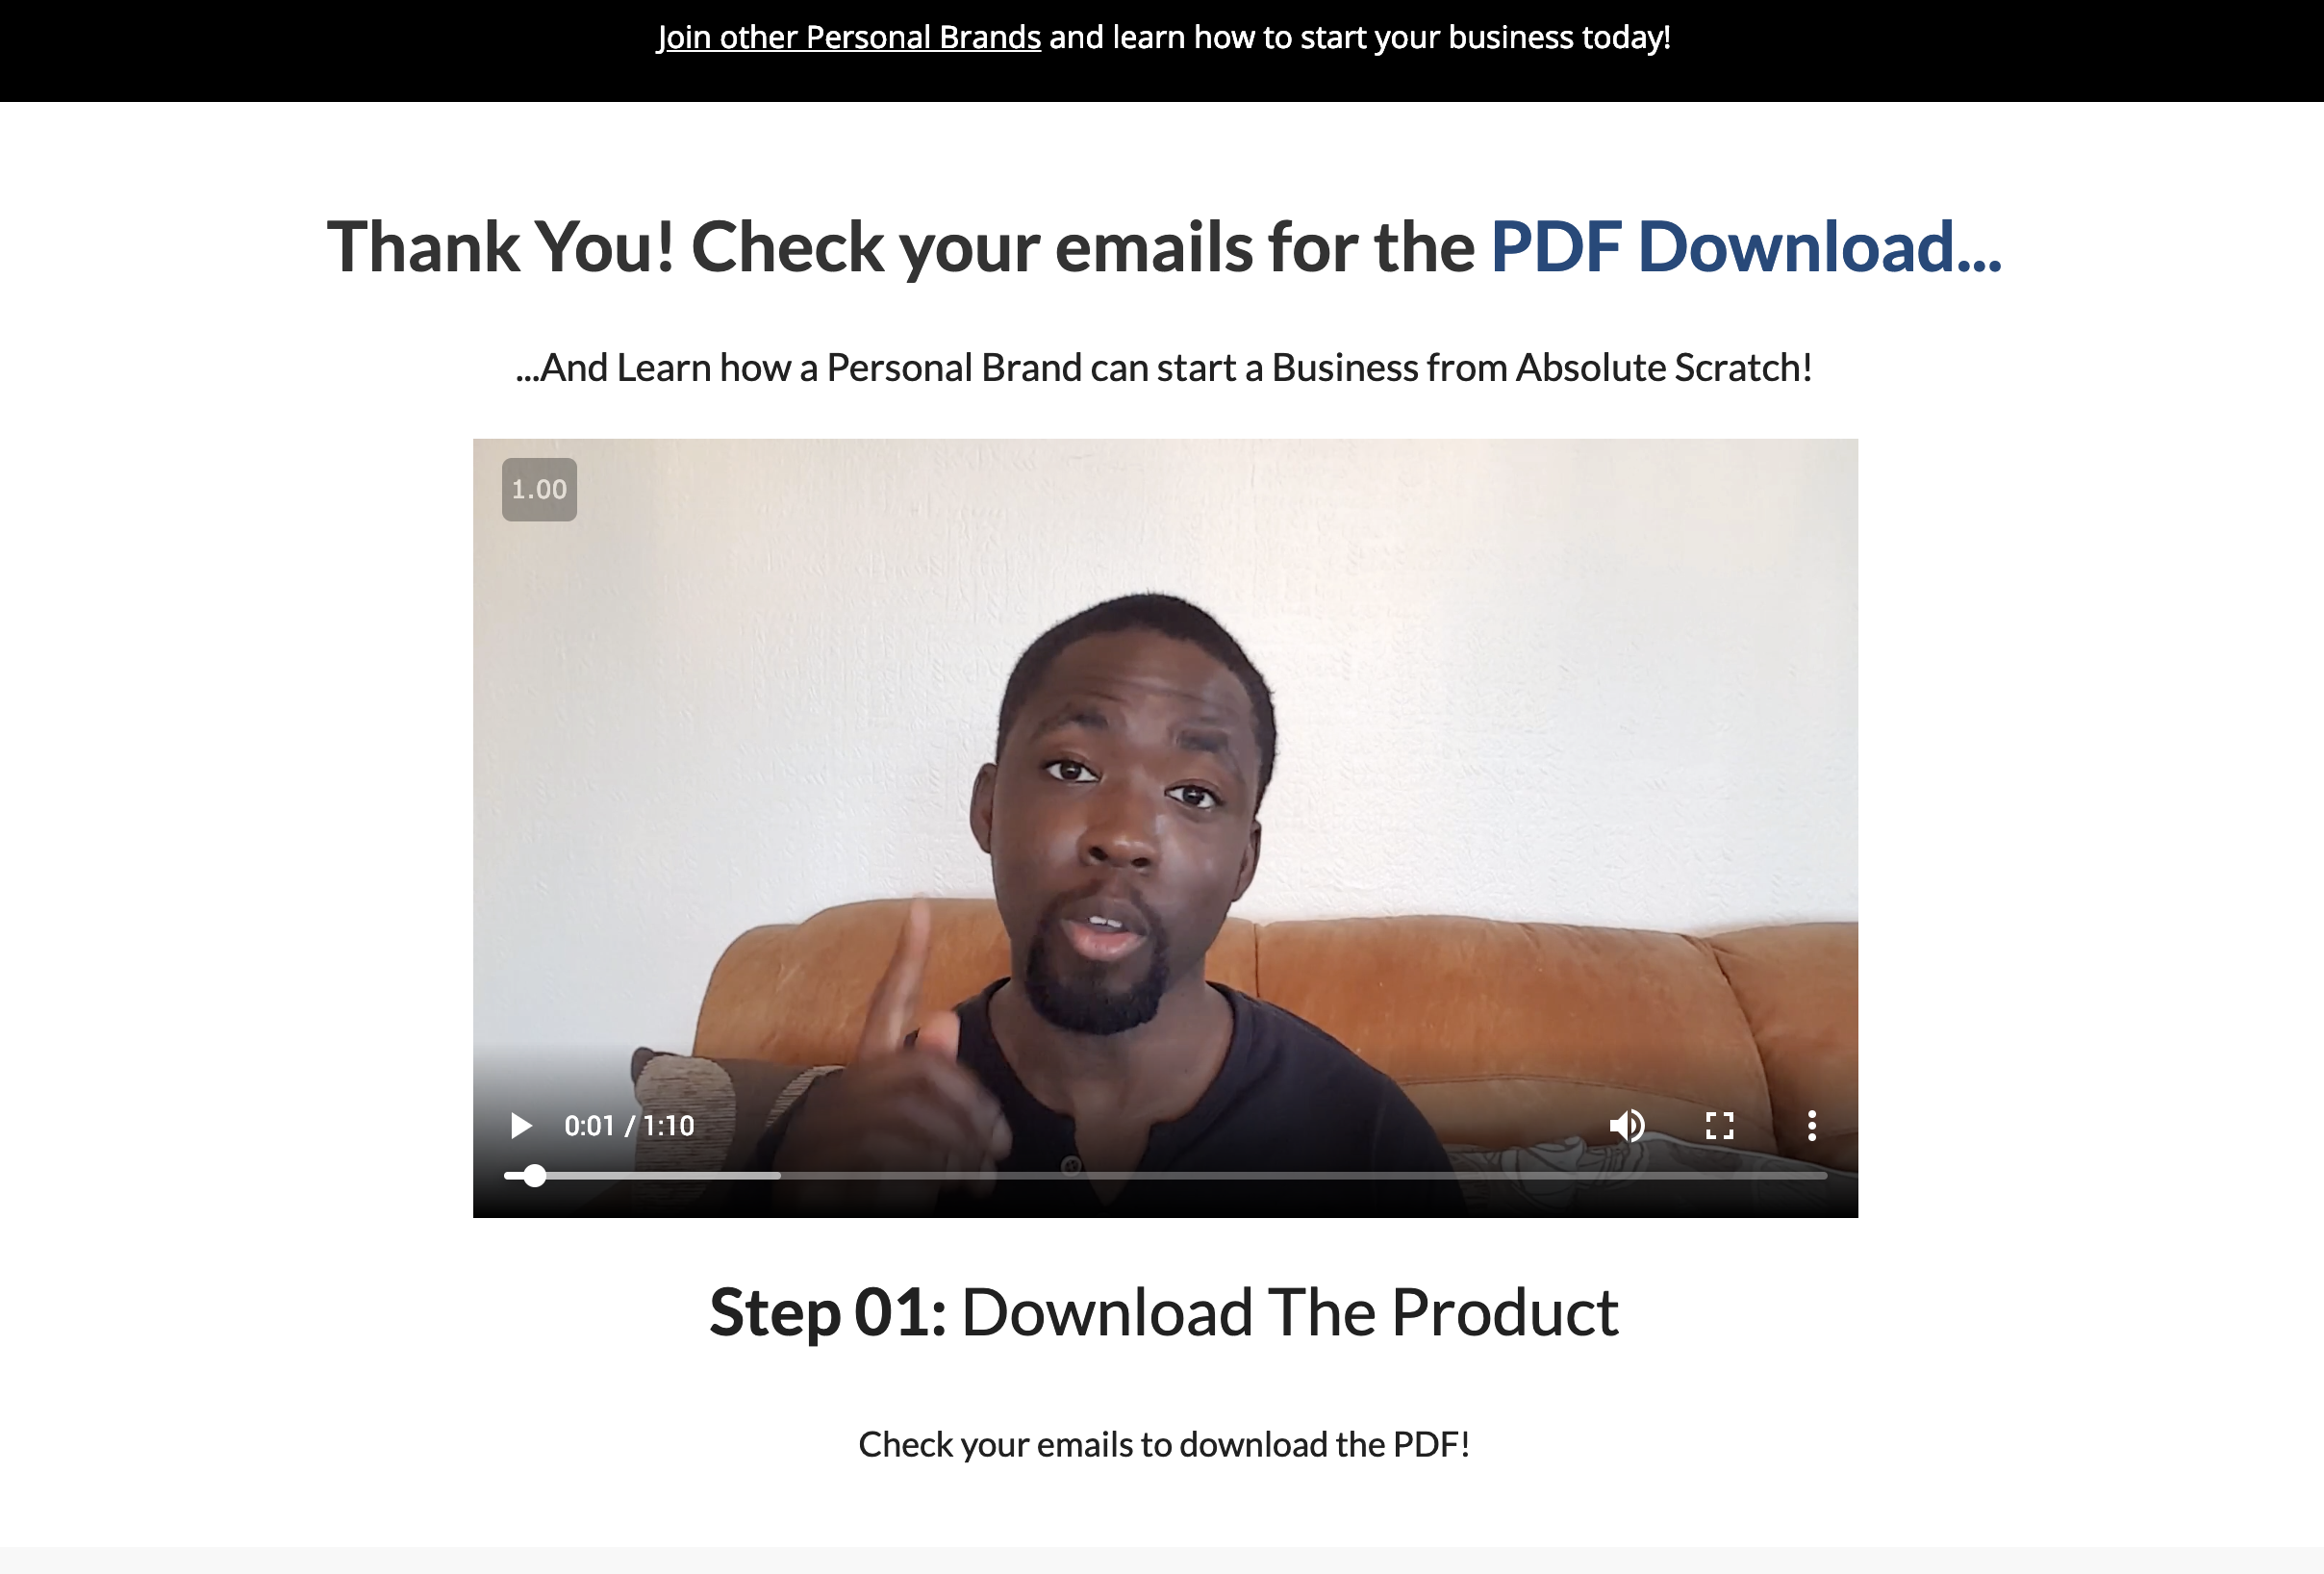
Part 1 of this article showed you how to do your customer research, craft a compelling message, start creating your offer and develop your landing page. Following on from this it is important to make sure you create a redirect to a thank you page once a lead has submitted their details. This should have a headline that has a CTA to check their email for the offer, for example:
Thank you! Check your inbox to get started with your training!
In this instance, the “Thank you!” could be a standalone H1 header, whereas the “Check your inbox to get started with your training” could be a subheading underneath it. On the same page you could also have another CTA that does the following:
- Gets them to check out more training
- Buy a low barrier One-Time-Offer
- Encourages them to fill out a survey
- Prompts them to follow you on social media
As always, keep it simple at the beginning and work on introducing these CTAs later on.
One-time-offers

One time offers are a great way to minimise advertising cost if done correctly. They are also a great way to gain another micro-commitment from them by proving they are a customer. These 0ne-time offers can range anywhere between £15-£100. They consist of products, tools, software or resources that are deemed as useful to the lead. The success of the one-time-offer is very much dependent upon understanding your ideal customer, and how you present the offer to them. This is usually done via video on a thank you page, or another landing page. It was usual practice to have one time offers as your thank you page, but as Facebook began to check funnel pages, it may not be aligned to Facebook’s Ad policy. In recent years, more digital marketers produced a time-sensitive one time offer in their email sequence. This gave them control over the offers that could send to their consented leads.
Facebook Pixels
I have done a whole article on how to create and install a Facebook Pixel to your website, so check it out here. Pixels are important for tracking activity on your website or landing pages, as well as identifying what action people have took. This data will be analysed on your ads manager, helping you determine what actions to take next.
Content on your website
I am a believer that you should be producing searchable SEO friendly content on your website at least twice a week minimum. This content needs to be extremely useful to your audience, allowing you to stand out as a brand. Quality in this instance is defined as:
- SEO friendly posts
- Searchable posts
- Well structured posts
- Logical posts
- Helps solve a problem
The reason I mention this is because great content attracts your audience organically and when promoted on Facebook using advertising. It also gives the opportunity for your Pixel to be conditioned, identifying the right people in your audience. This is why keyword research and customer research is important from the get-go!
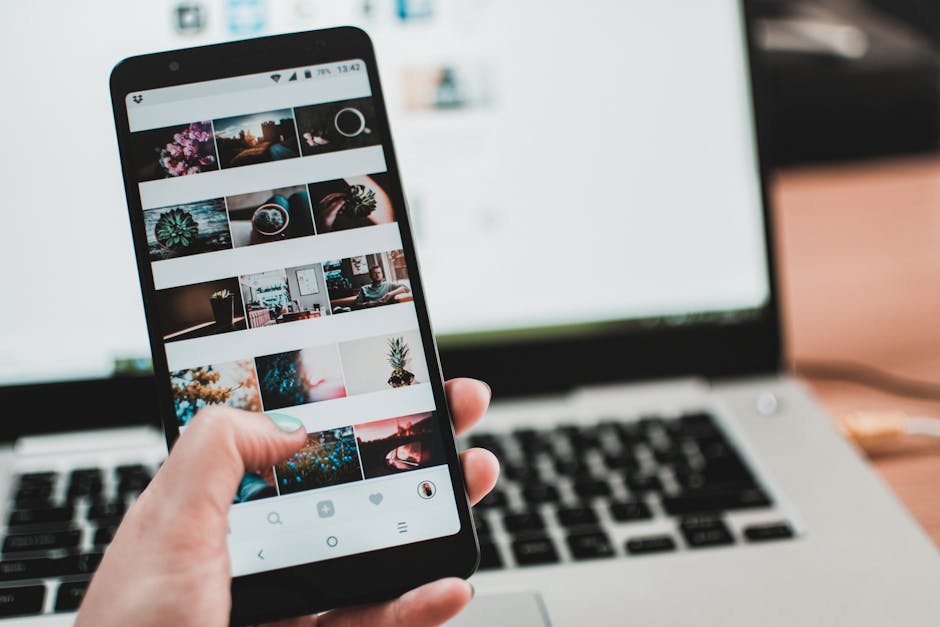
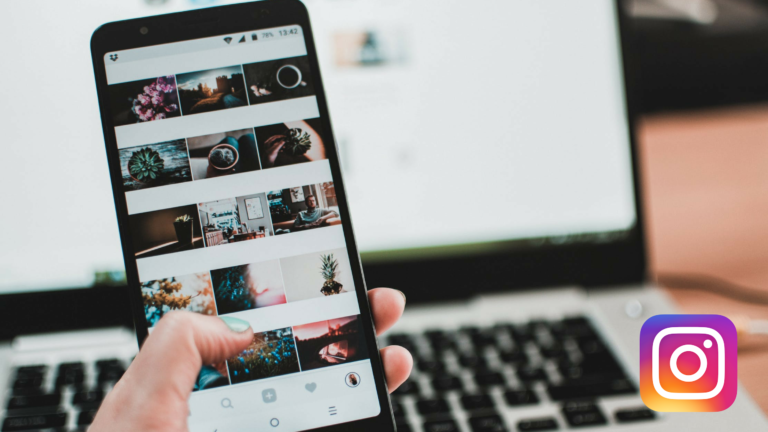
If you have an Instagram account, it’s always a good idea to get a content strategy developed for it. Check out what other people in your niche are doing and take note of the themes that work and don’t work. Determine what hashtags are being used and decipher what hashtags will allow you to get noticed, based on how many hashtags are being used at that time. For example, #successquotes has 4.4 million posts, whereas #successsecrets has 21.4k posts as of February 2019. If you get engagement from posting quality content frequently using engaging descriptions and the right hashtags, you’ll grow.
This is useful for re-targeting people who have engaged with you promoting Ad on Facebook or Instagram to them. Look-a-like audiences can also be created from this audience, dramatically expanding your reach.
Setting up your Ad
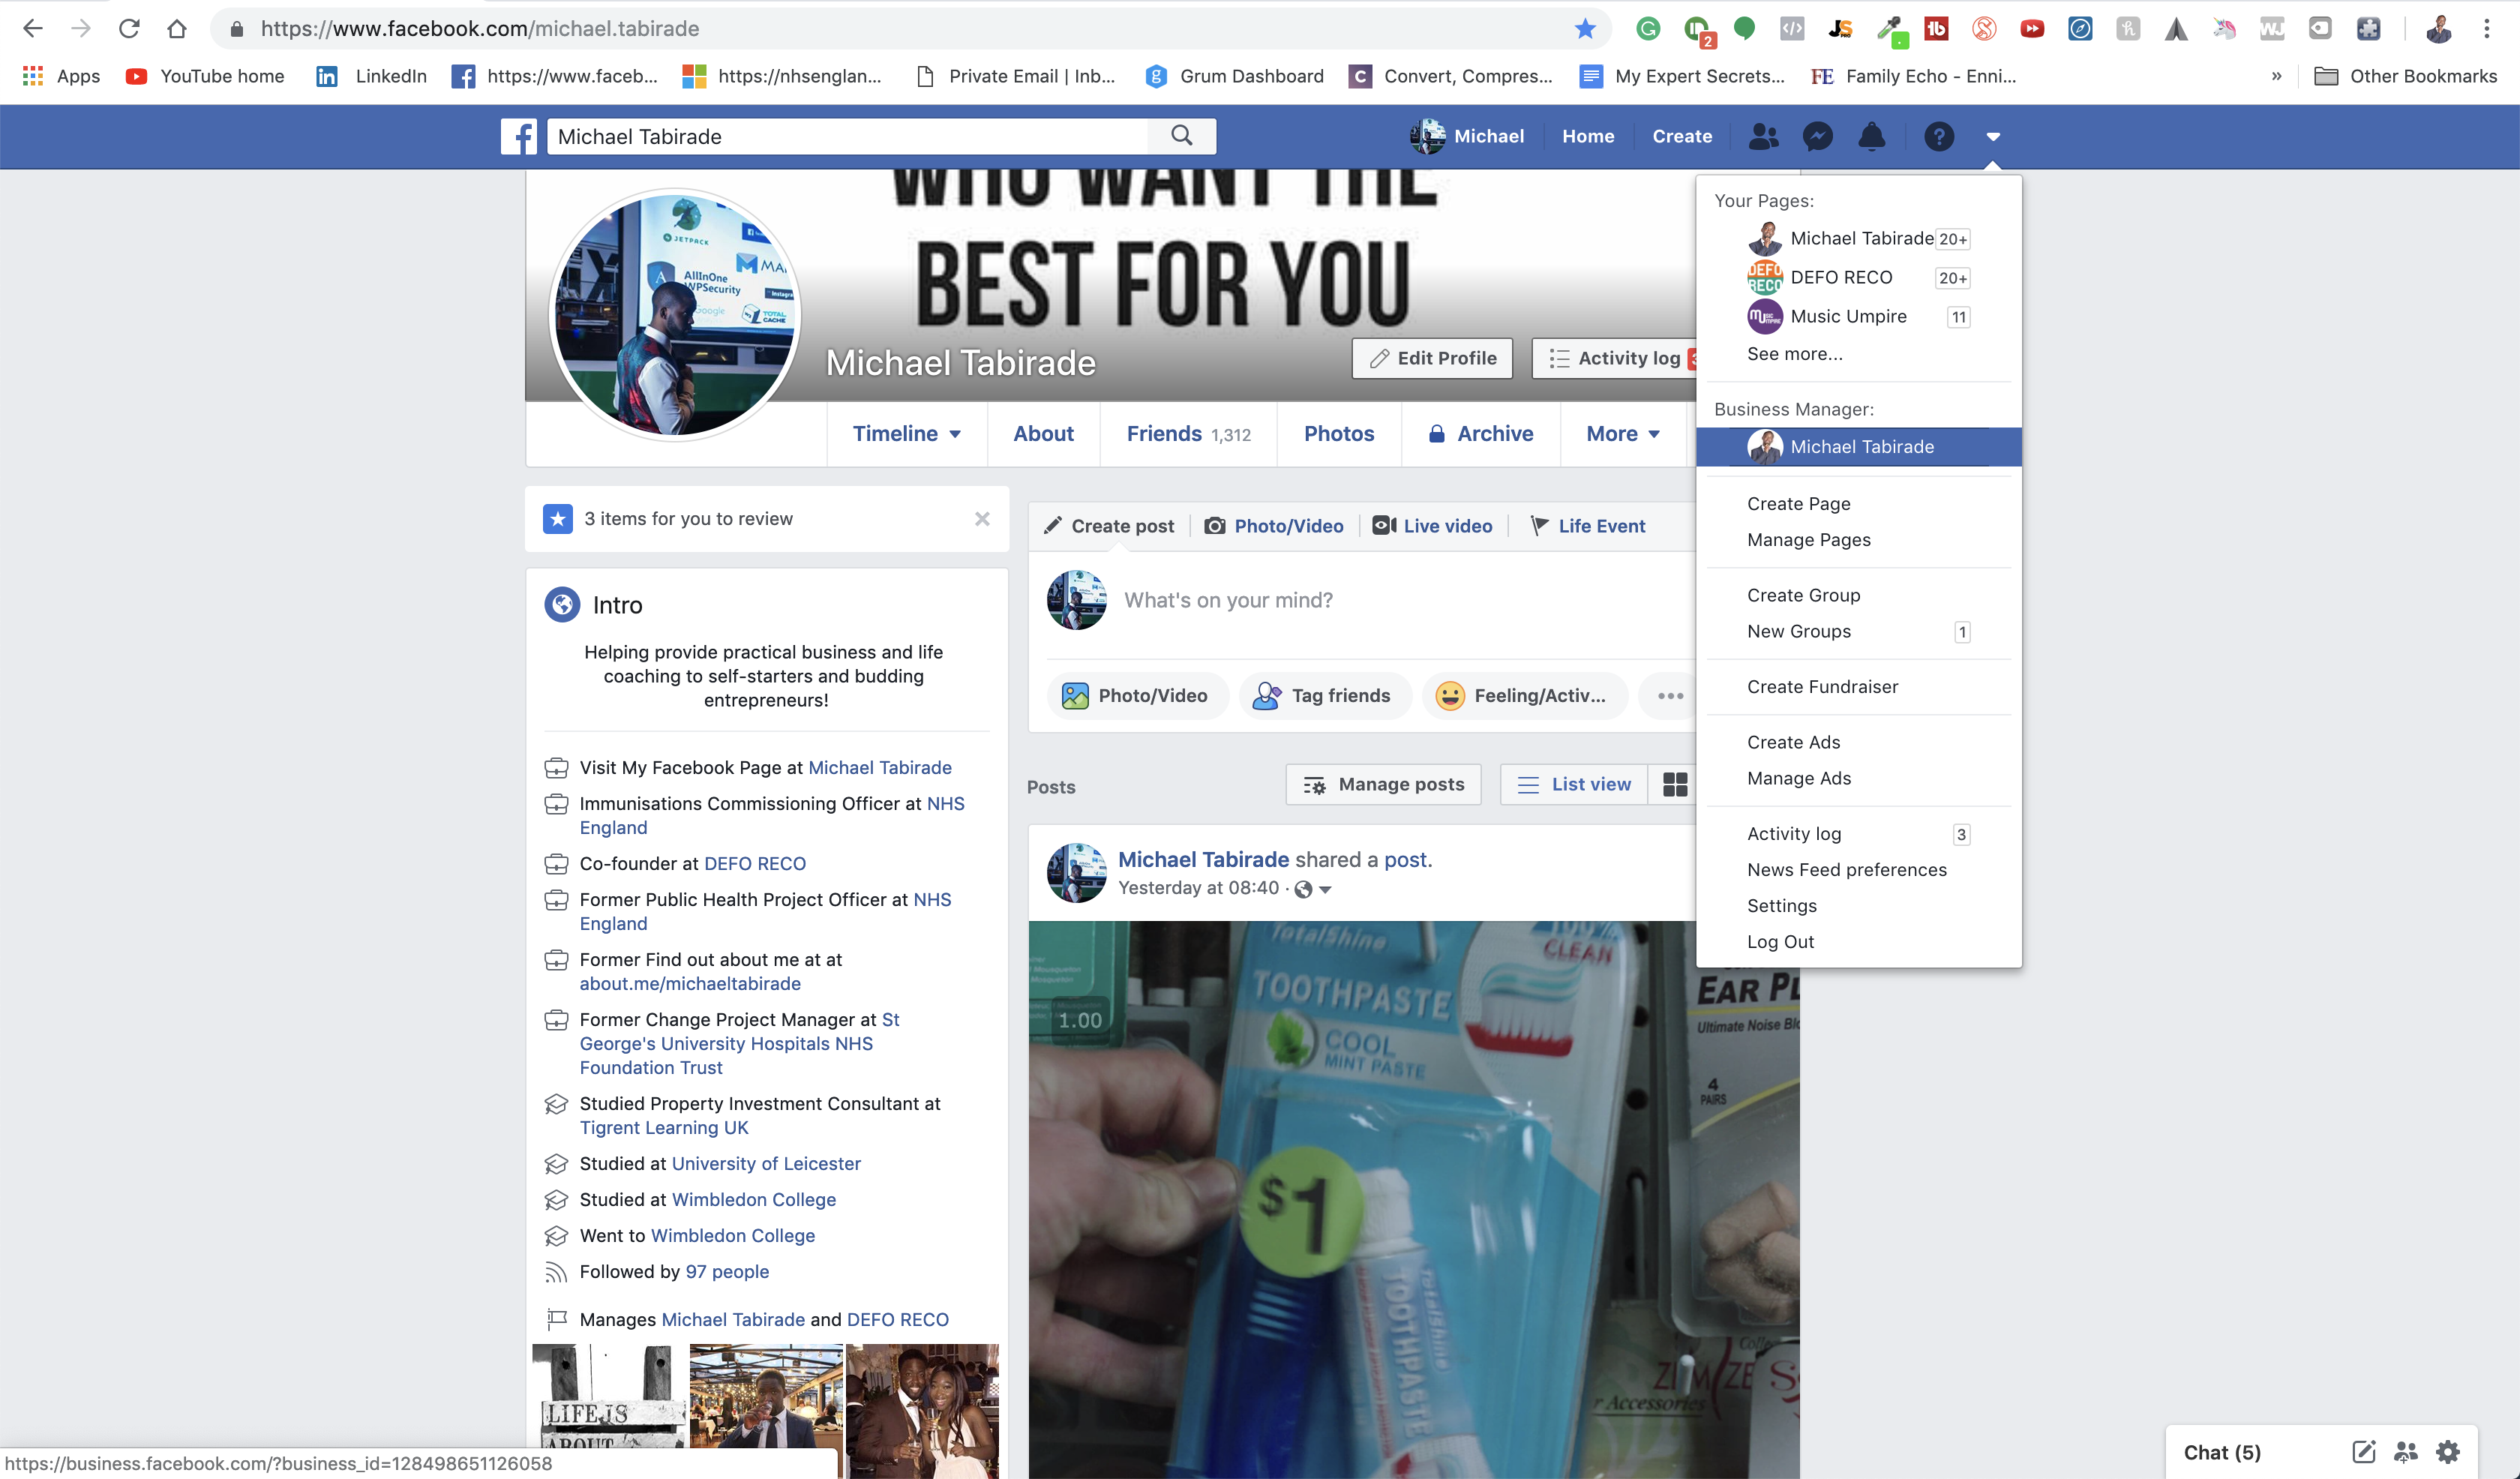
You’ve done all the groundwork, now it’s time to start setting up your Ad. Go to your Facebook profile and on the dropdown arrow in the top right-hand corner, select it and go to your profile under Business Manager. If you don’t have a business manager profile, you can set one up here and follow the instructions.
Once you’ve created a business manager account, you need to add your payment information to your account. Go to Business manage> Settings (Cog wheel icon on the RHS)> Payments (bottom LHS on the sidebar) and Add payments> Add. Complete your card information and you’re good to go.

Ads Manager
When the above is complete, navigate to the hamburger menu icon on the top RHS> All tools> Ads Manager. This will take you to a dashboard that allows you to analyse performance data on your Ads. Before we do that we need to create an Ad! Click on the green “Create +” button, and it will take you to a new page in Ads manager.
There are three elements that make up a collection of your Ads:
- Campaigns – These define the Objectives of your advertising efforts and houses all Ad sets and Ads for that specific objective
- Ad set – This defines the targeting, budgeting and scheduling for a specific set of Ads. It’s defined for the Ads you create within an Ad set
- Ad – Here you can add your picture or video, headline and Ad copy, pixel and ID information, as well as the type of button you want
So to clarify you can have one campaign, that houses many Ad sets, and that Ad sets houses many Ads. A rule of thumb is to always make you have one Ad per Ad set. It makes it easier to analyse and organise your data in the long run.
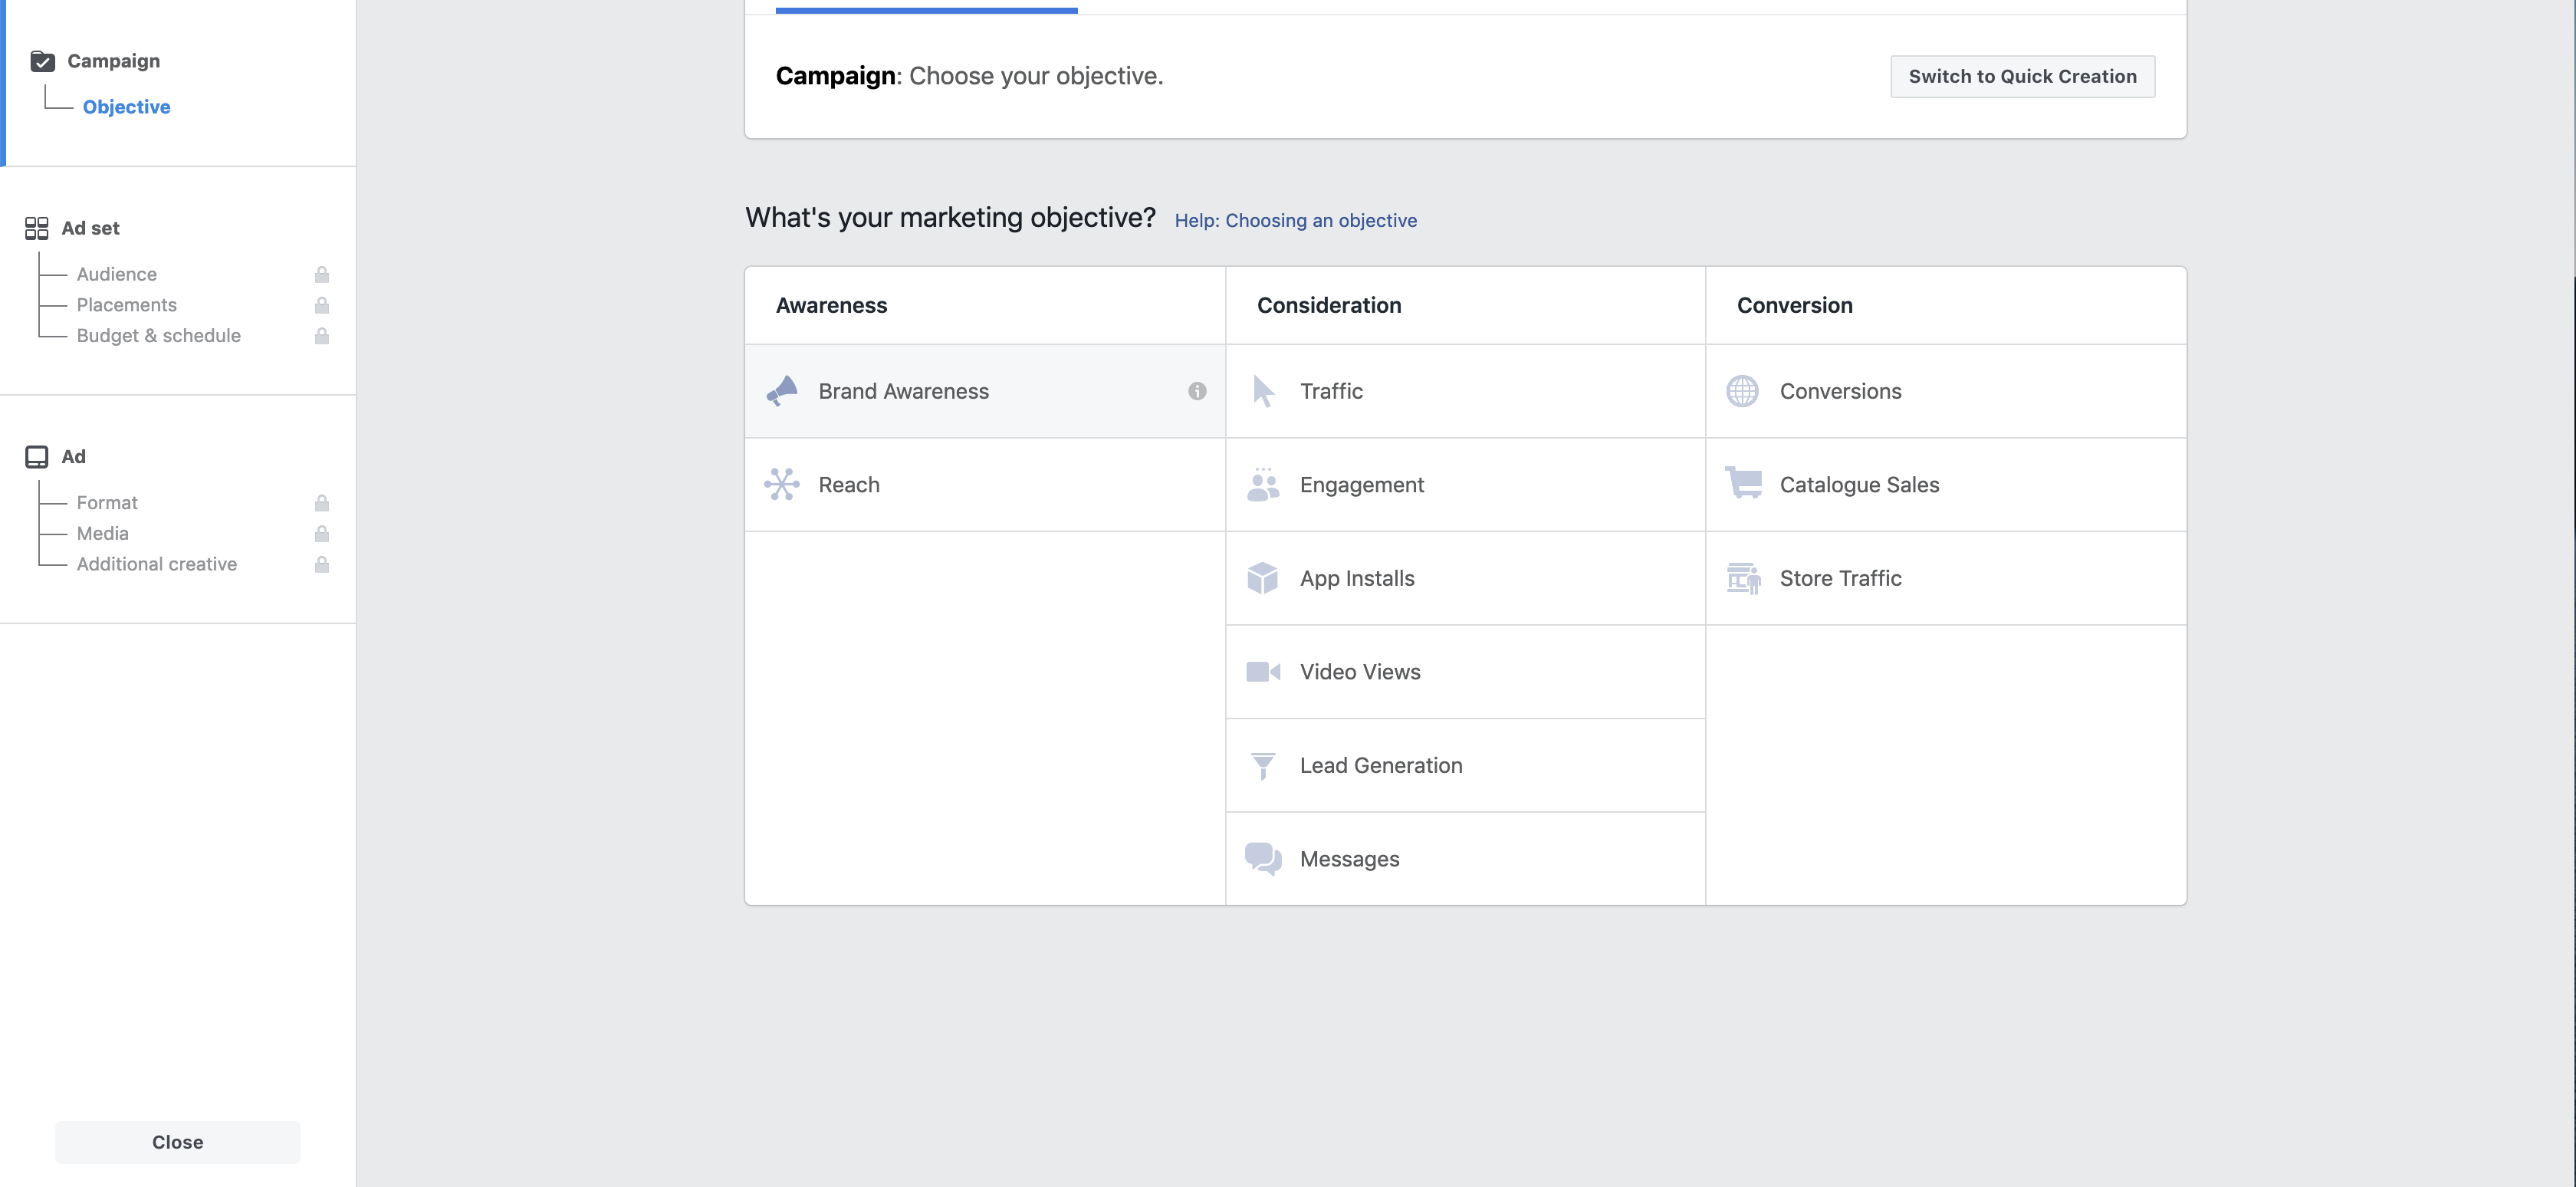
Objectives
Quite logically, Facebook has made it clear as to what each objective does in relation to your advertising. It has split up the objectives into three bits, and here are the definitions from Facebook:
- Awareness: Generates interest in your product or service.
- Traffic: Gets people to start thinking about your business and look for more information about it
- Conversions: Encourage people interested in your business to purchase or use your product or service
For some of you, you may already have a strong community or awareness of your brand, so many you will not need this. However, it always depends on your objective. Many of you will want more people to look and their business and so a consideration objective will make sense. This is where most Facebook Advertisers spend their money. And another proportion of you will want people to buy or use your product. Again, many people use this type of Objective, specifically the conversion objective.
For many personal brands they are likely to use:
- Traffic – Great for eyeballs on your website
- Engagement – Fantastic for generating social proof
- Video Views – Good for knowing if people value your product or service
- Lead Generation – Brilliant for growing your email list or bookings
- Conversion – Superb for lead magnet opt-ins
Naming your Objective
Select an objective, in this example, we will select the “Lead Generation” objective. When naming your Objective use the following format [Niche topic] | [Type of Offer] | [Objective] for example, Personal Budgeting | Checklist | Lead gen. This way I know that when I check my Ads manager, this campaign objective will be focused on the Personal Budgeting niche, the lead magnet is a checklist and I’m running Lead gen Ads.
Ad sets
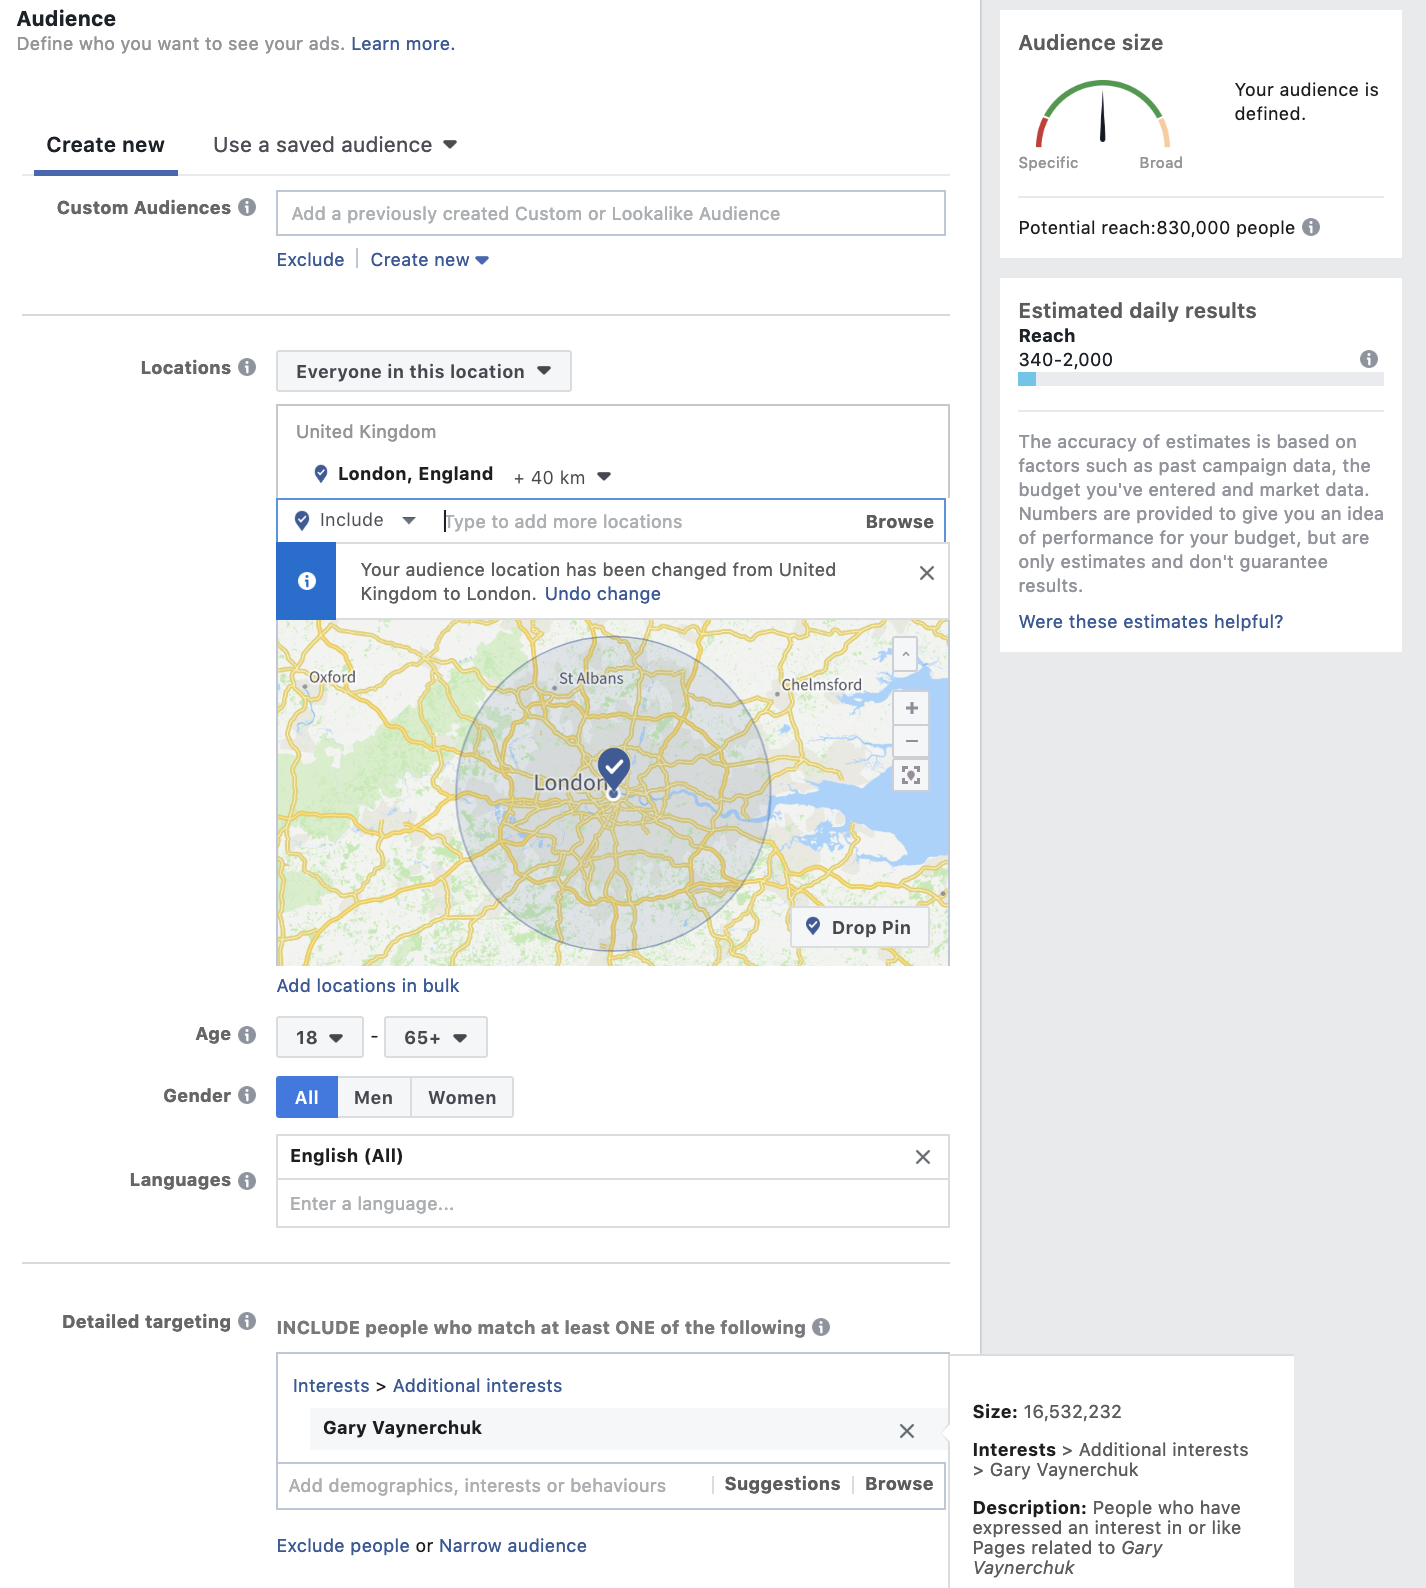
Now it is time to set up your Ad set. On the right-hand side of your page, you will see an Audience Size meter. This spans from a specific audience to a broad audience. There are many different theories as to how many people you should target. Previously people stated that the more specific (smaller size) the better, whereas more and more people are stating that the bigger the better. I would say it’s dependent upon how you target your audience. An audience that is too specific equates to a smaller pool of people to target. An audience size that is too broad equates to inefficiency with Ad spend. If your Audience size is between 100,000 to 5,o00,000 I would argue that it is safe to proceed with. As your audience size changes, your estimated daily result changes; this usually describes your reach or leads. The next sections will detail the steps you need to take.
Audience
- Under the Page section, select the Facebook page that you would like the Ad to come from
- Next, under the Audience section on the “Create New” tab you can do the following options by the custom audiences:
- Create a new custom audience
- Select an existing custom audience
- If you do not have a custom audience skip this section until you do
- Type in the locations you want to target. If you know for a fact your audience is in a specific city or country, select those locations. If not select the top 5 English speaking countries to determine where you get the most engagement. This is why you did the research before in part 1.
- Select the Ages you want to target. Do not do everyone if it doesn’t apply to your niche, target the right age ranges and check out Audience insights for clarity
- Choose the gender you are targeting. You’ll know this information on the activity you get from your website or social media or the research you have done prior. If you unsure leave it as “All.”
- Pick the language you want to target, this is usually “English (All)”
- If you haven’t created or selected a custom audience, under detailed target select an interest and/or behaviour related to your niche. The list of thought leaders generated in part 1 becomes useful at this point! Choose one thought leader’s page to target. Essentially you will be targeting their audience
Placements
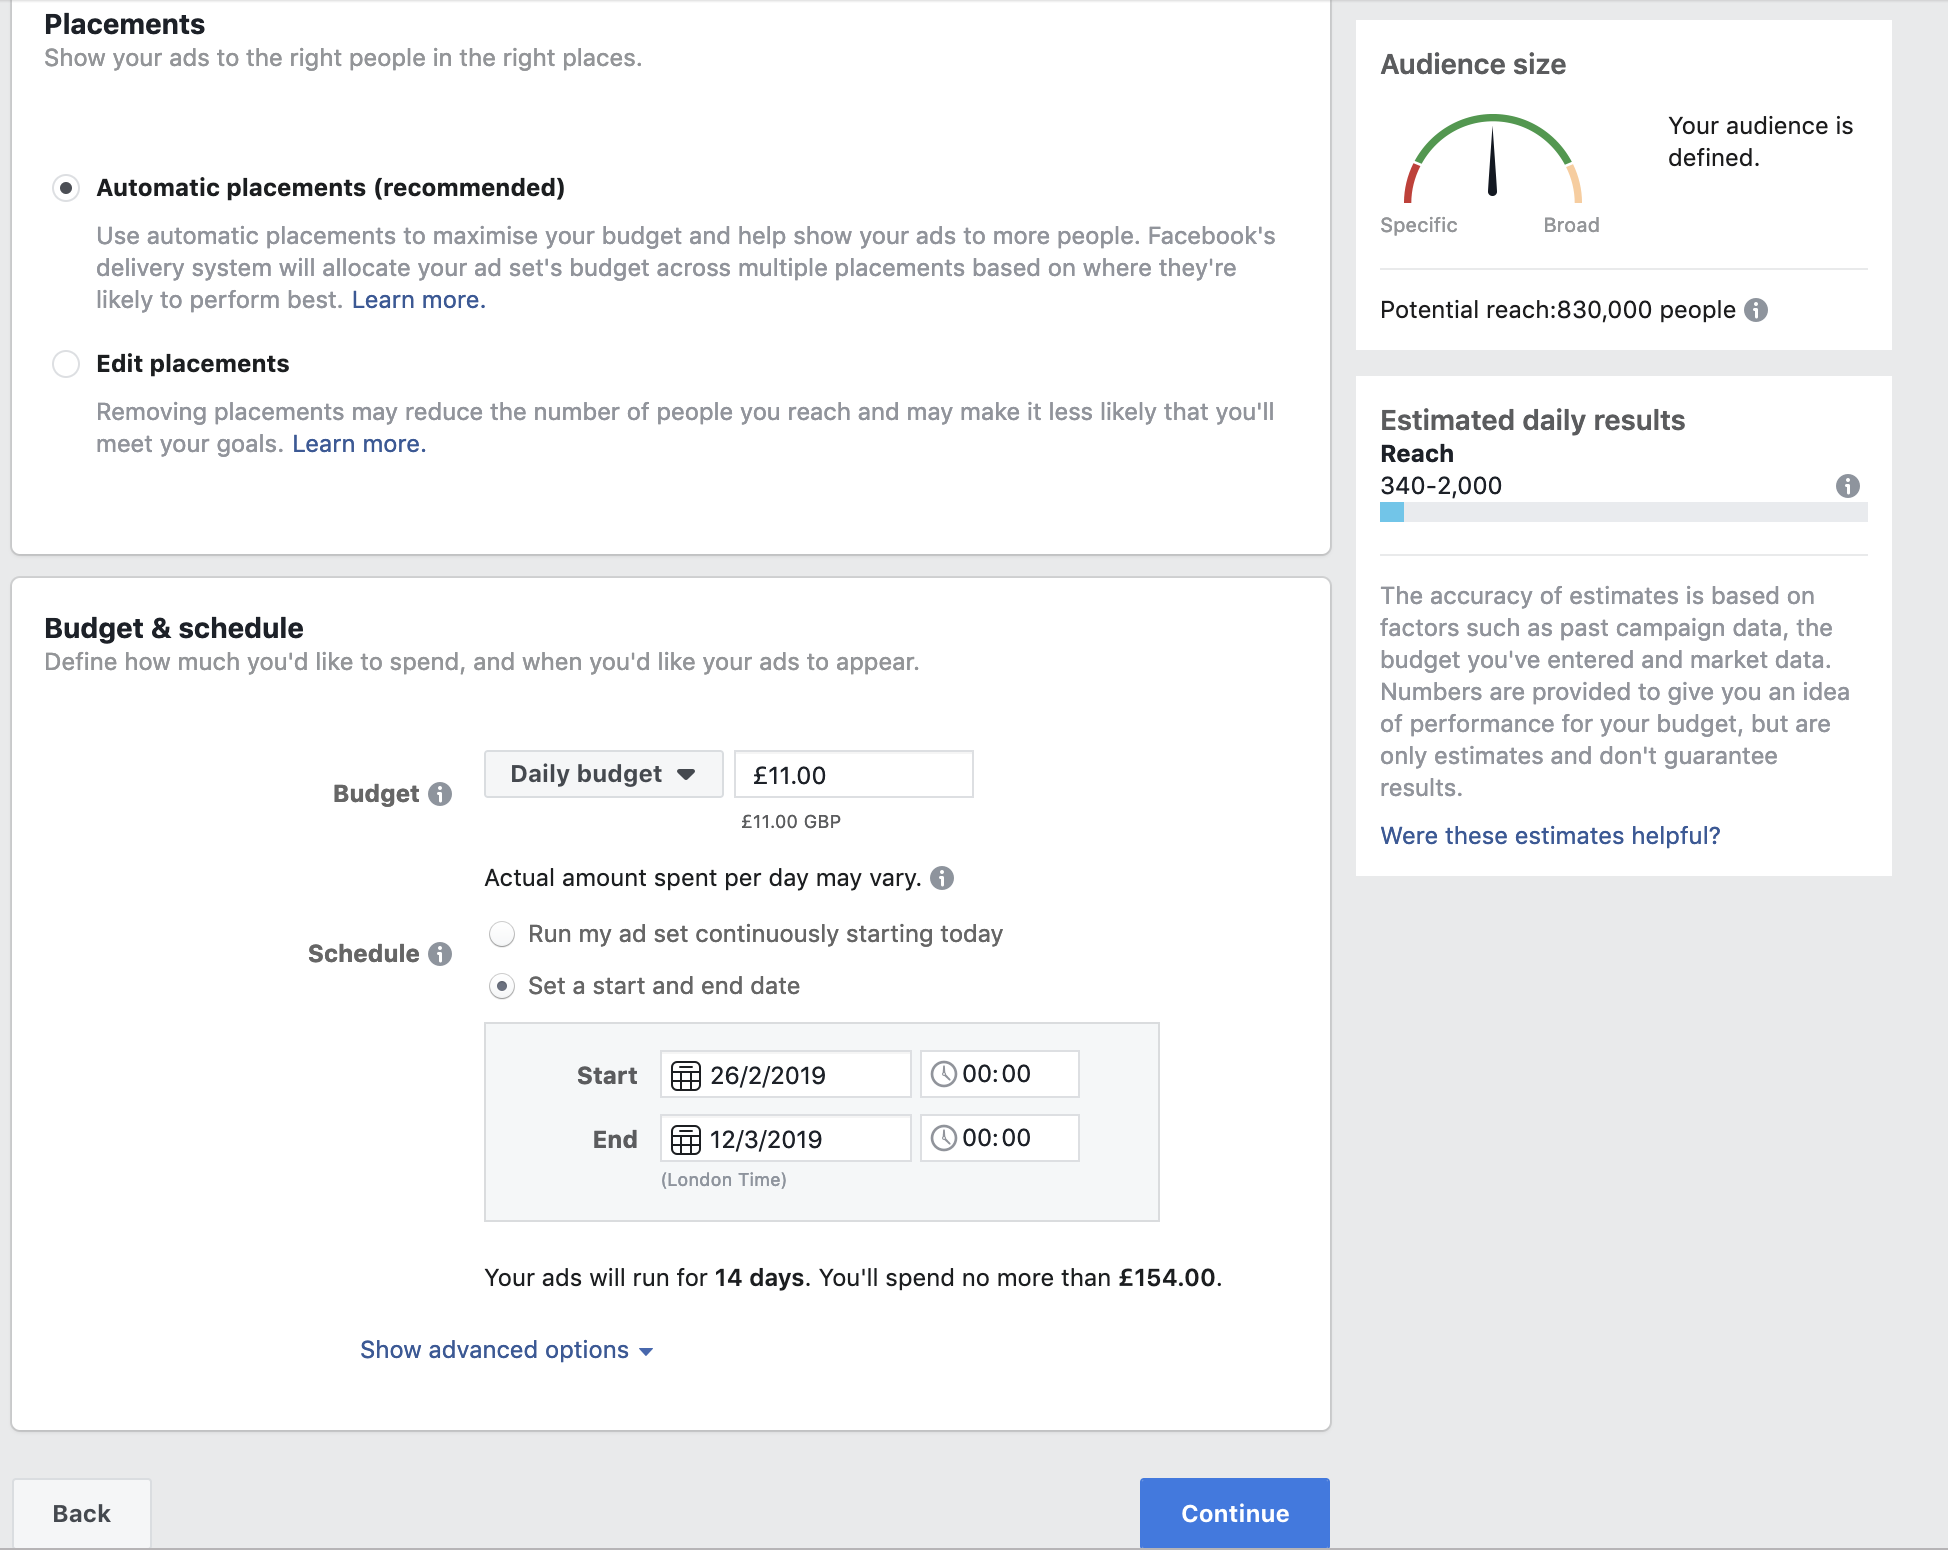
Under placements, you want to leave it as Automatic Placements (recommended). In other words, Facebook algorithm is pretty good at knowing where to display your Ads. Most of the time it’ll be displayed to the Facebook Feed. However, I would recommend that if you do want to create an Instagram Ad, I would create a seperate Ad set with a seperate Ad, with its placement directed only to Instagram. This is because Instagram’s Ad copy and graphics requirements slightly differ.
Budget & Schedule
And finally, you need to set a budget. When starting out choosing a budget between £5 – £16 to see how well your Ad performs and whether you need to make any changes. You want to run your Ad between 1 – 2 weeks, so schedule it for a week or two depending upon your budget (select the: set a start and end date option). You may also want to run your Ads on a budget of £10 a day to get slightly better results than a lower budget of say £5. Check that your Ad is running smoothly on you Ads manager after day 3, and then let it run for the 1 to 2 week period.
Naming your Ad set
When naming your Ad set use the following template: [Interest or Custom Audience Type] | [Type of Offer] | [Copy variant] | [graphic description] | [Objective], for example, Gary Vee | Vid Training | Brand headline | Michael smiling pic. It may seem long to do this, but I know straight away what it means to me. You don’t have to follow this to a tee, but make sure you have a system for naming your Ads otherwise it gets really confusing. Highlight, right click and copy this title and use it as the same title for your Ad.
Ads
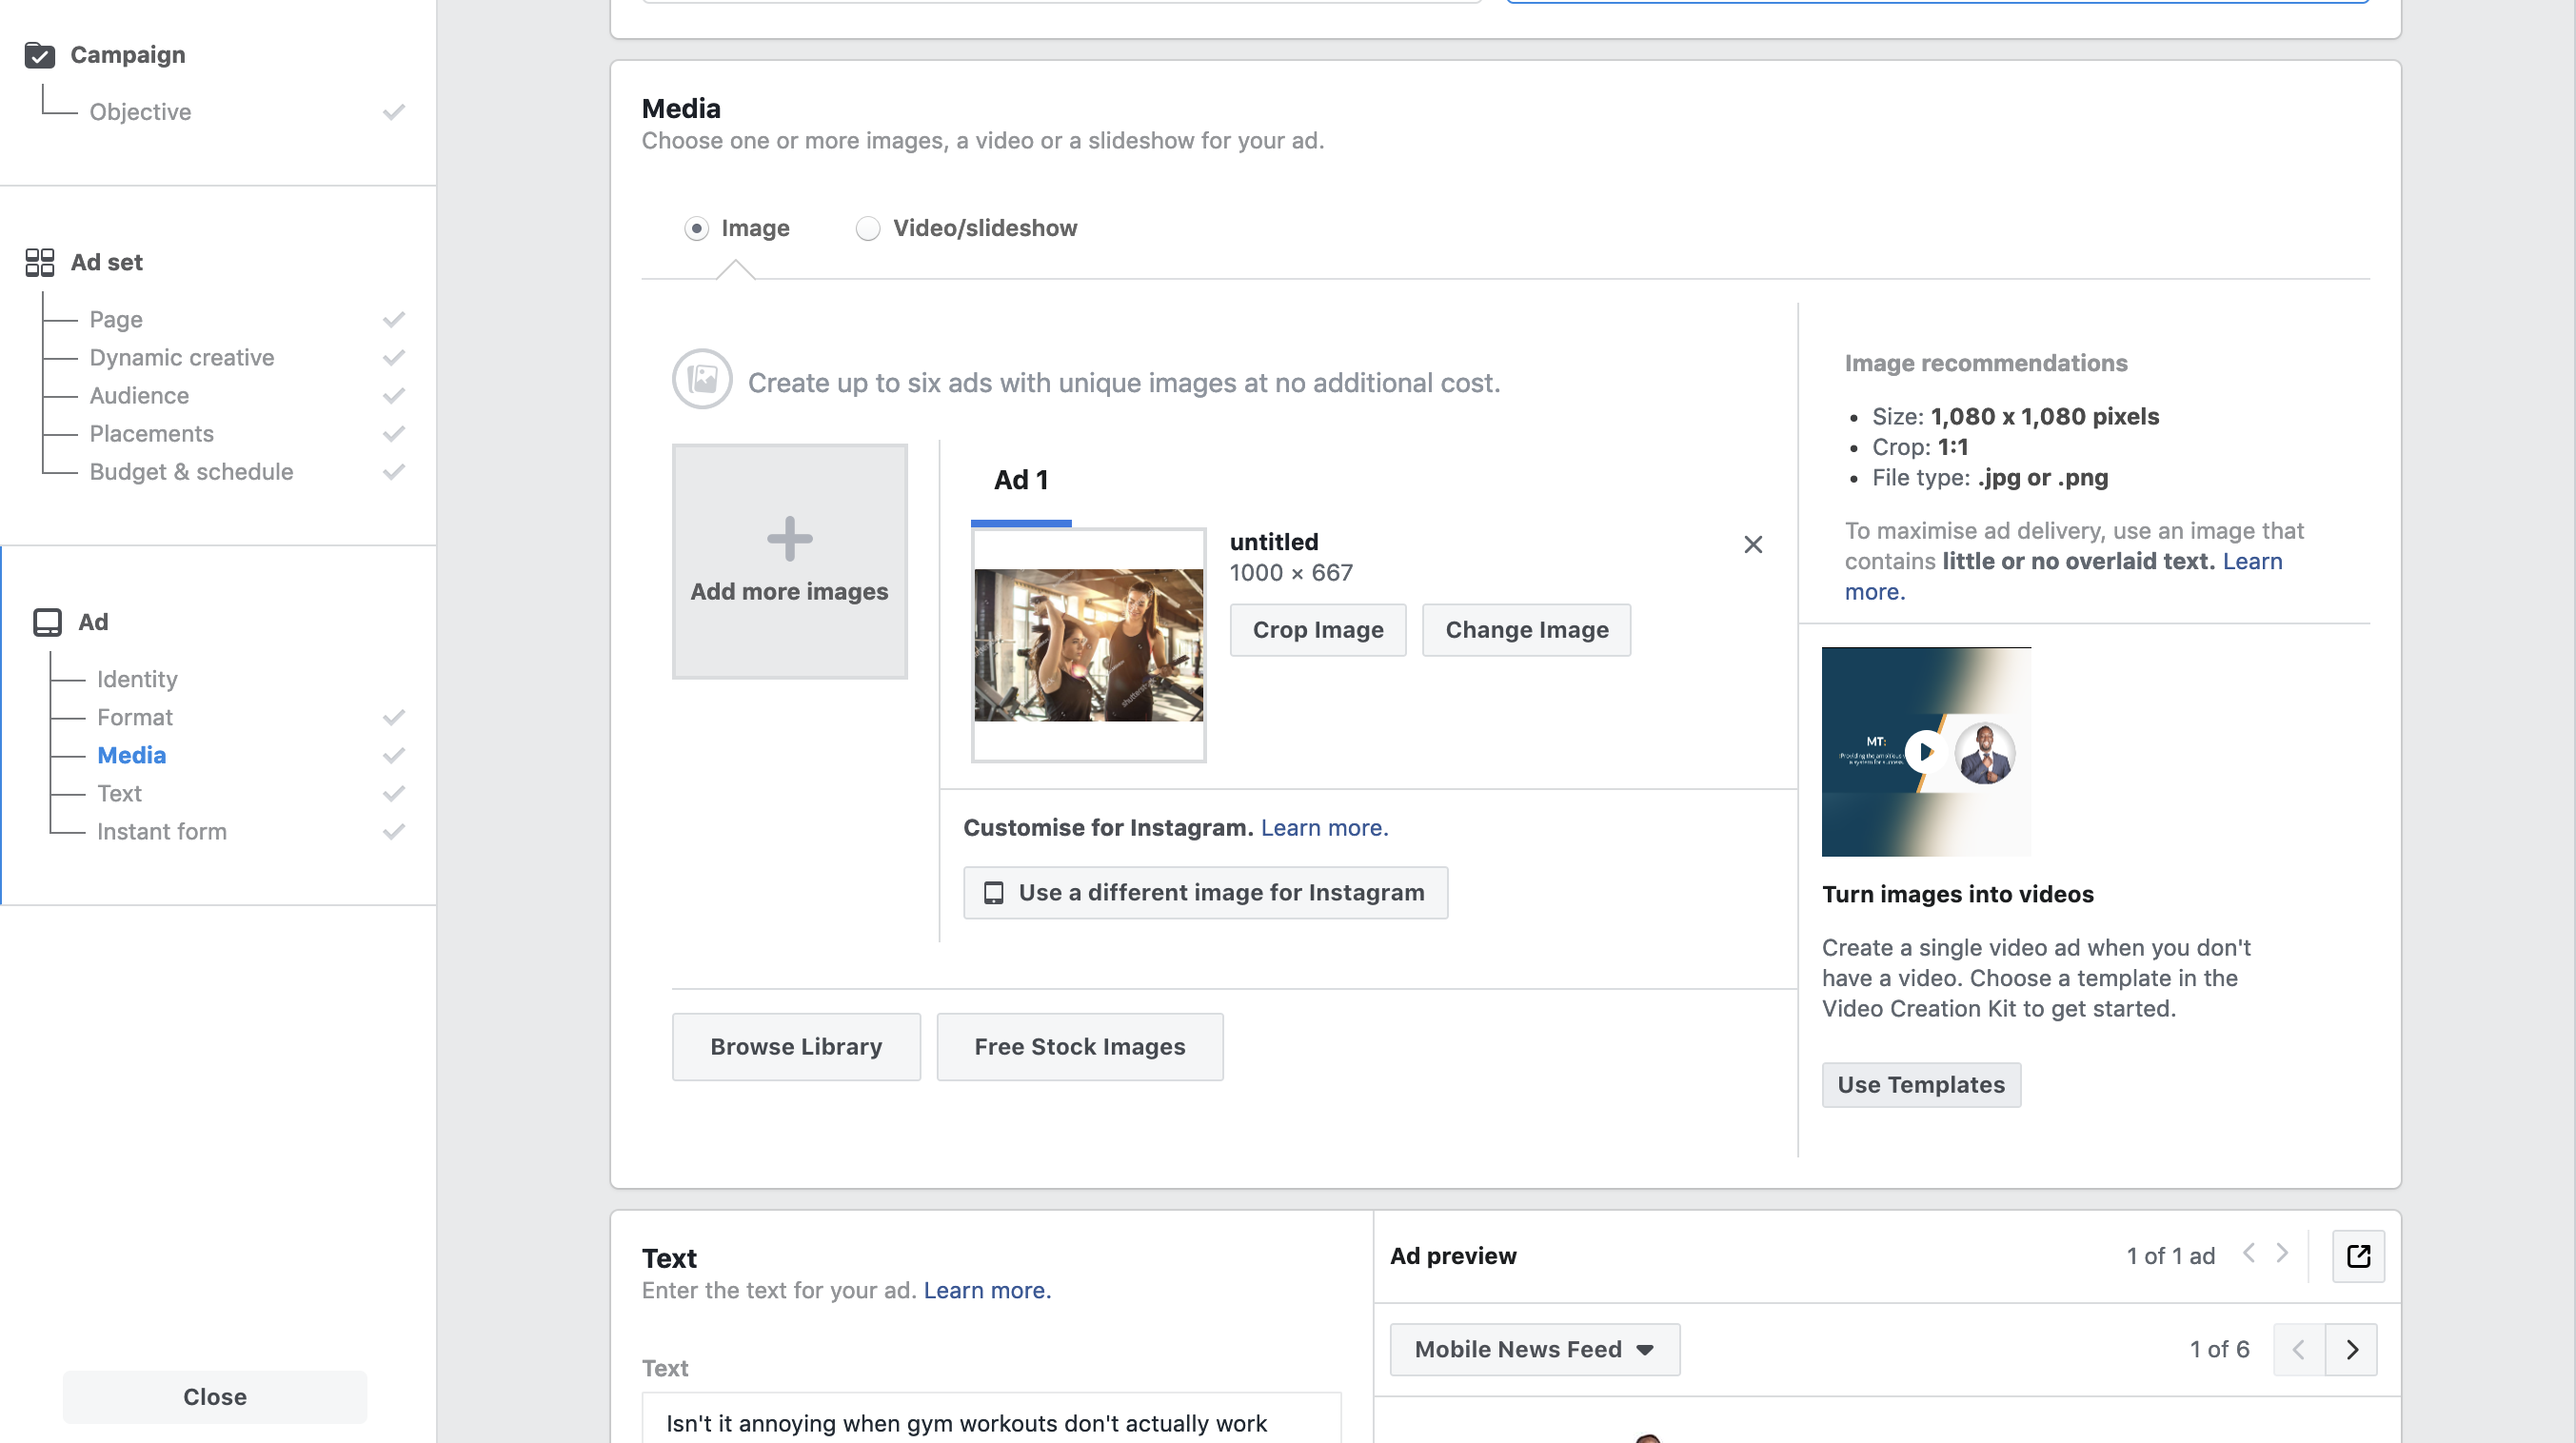
You are now at the final section. Make sure your Ad set name and Ad name are exactly the same. Make sure you do the following:
- At the Identity section select the Facebook page the Ad is coming from
- On the Format section select Single image or video.
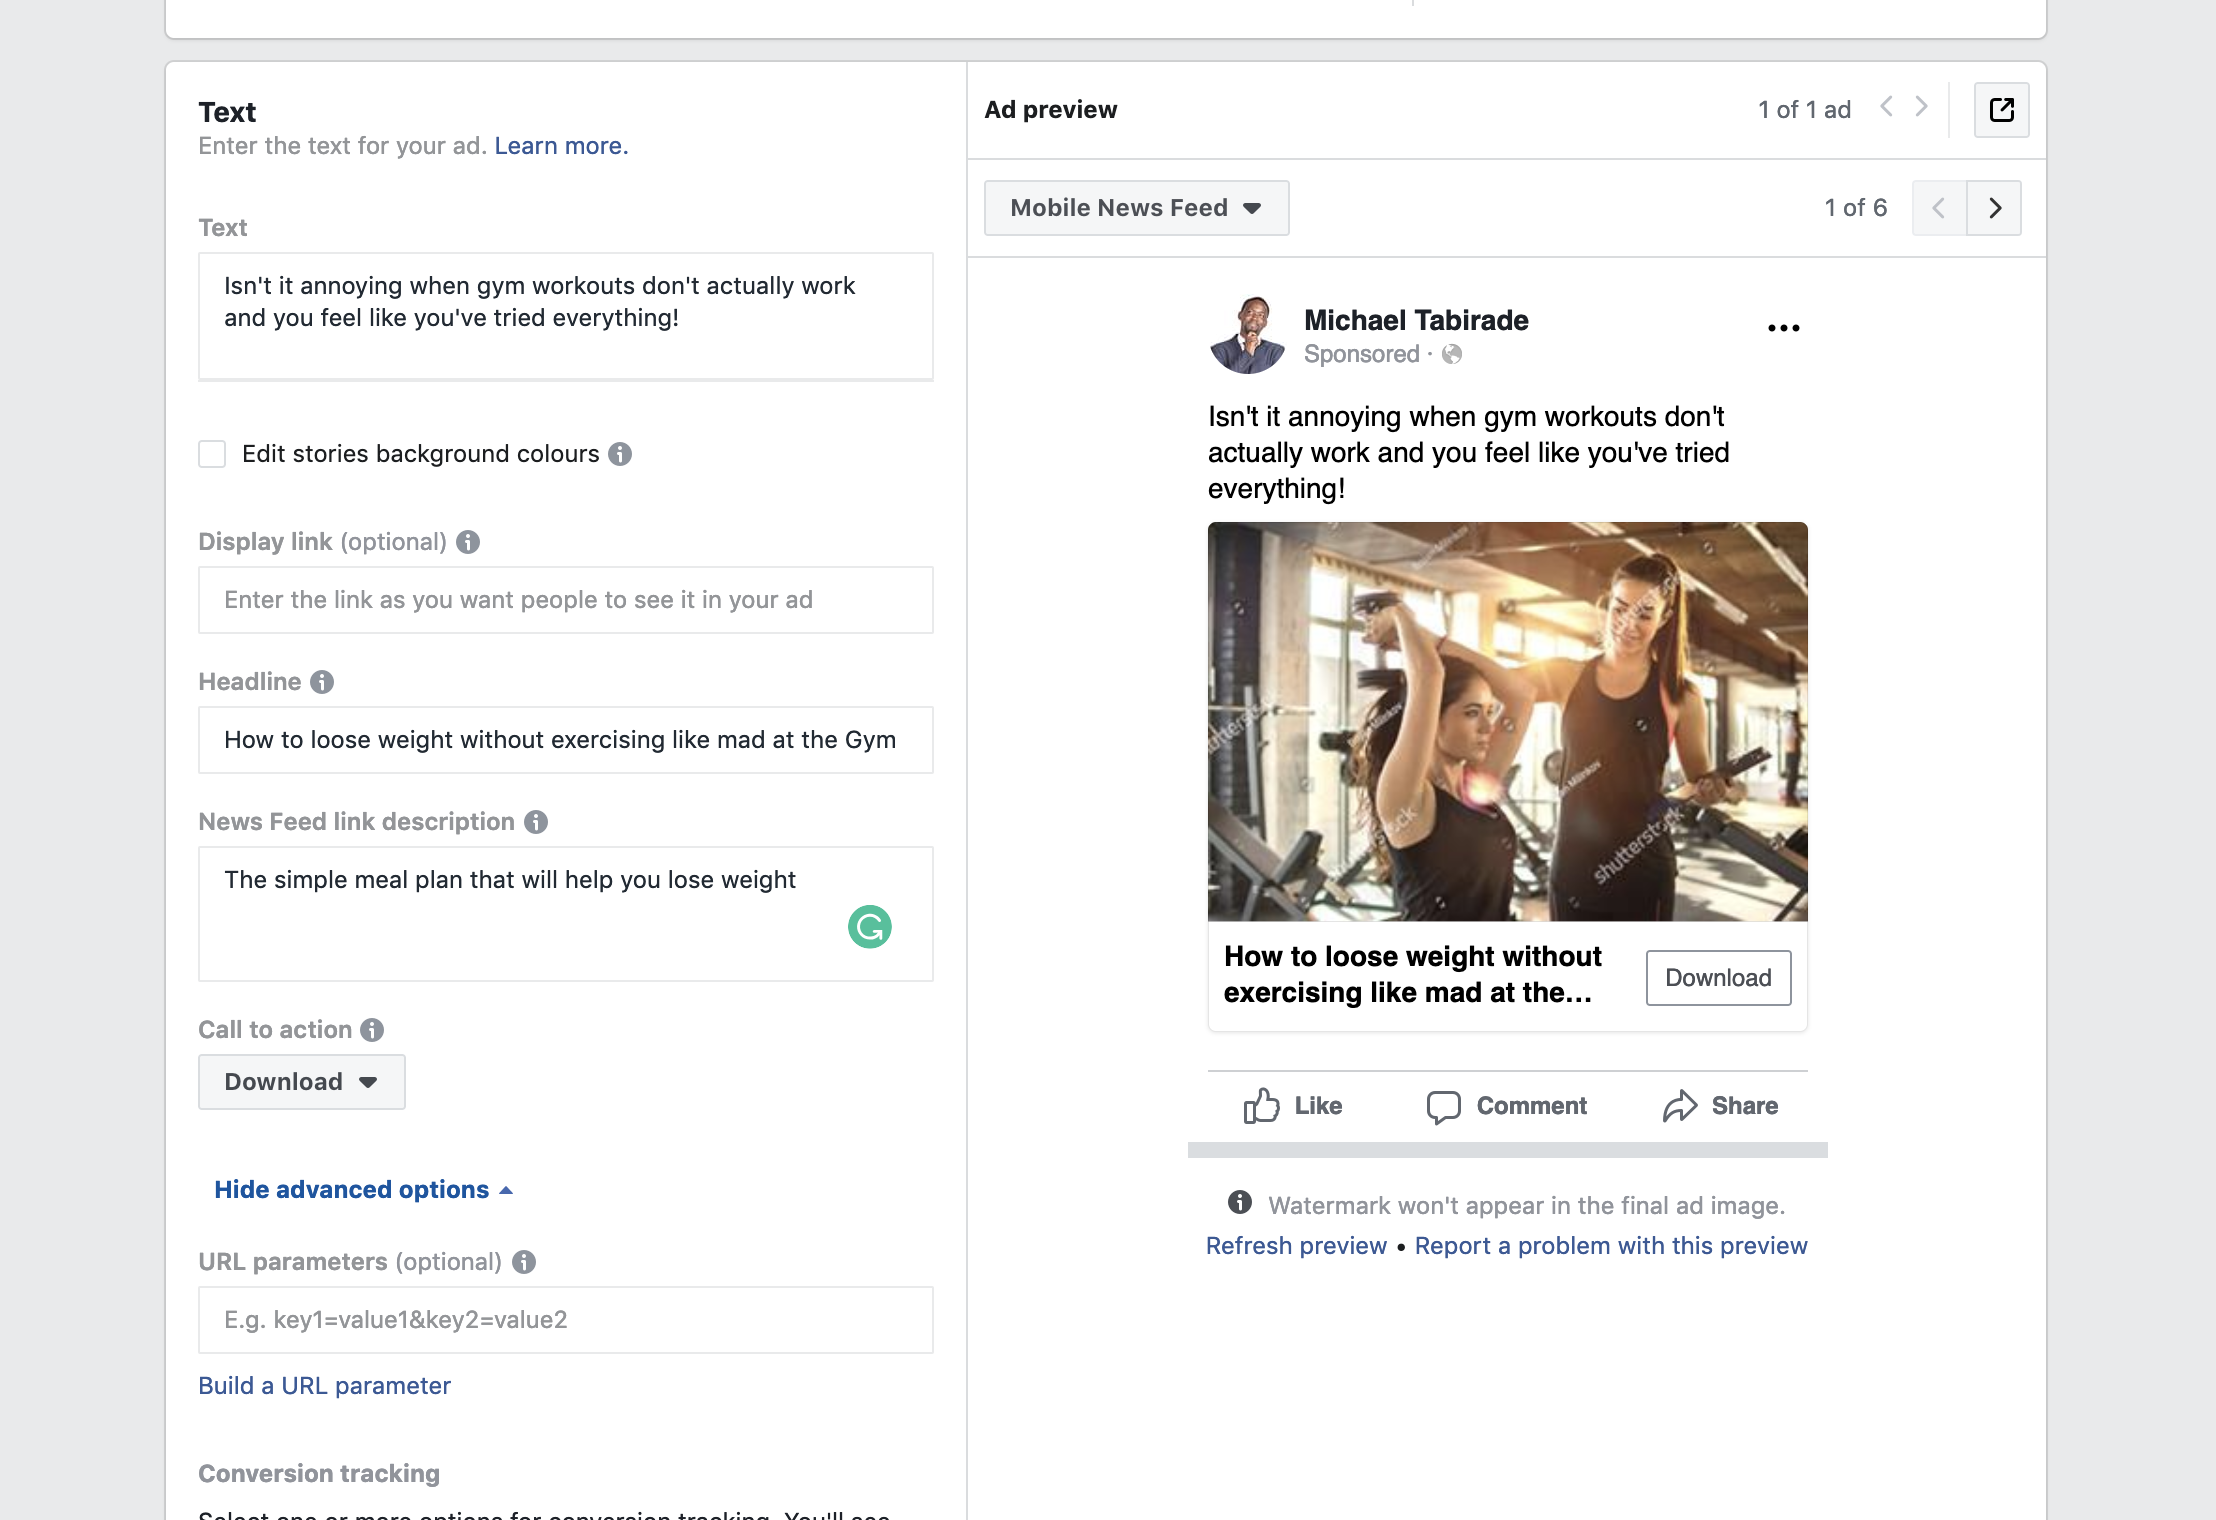
- By Media select the image or video you will use for your Ad. Facebook does have stock images you can use just in case you do not have any options. The stock image watermark will be removed once the Ad is up and running. However, I would encourage you to use a good image of yourself, or a video of you giving a training, giving your story or talking about your offer with a CTA at the end. Here are the image requirements for an image and video.
- Under the text option, complete the following sections:
- Text: This is where your Ad copy goes
- Headline: This is the compelling headline you deciphered in part 1 [Copy variant]
- News Feed link description: Think of this as the subheadline to the headline
- Call to Action: This is the button you such as Learn more or Download (personally I usually use Learn more)
- Conversion Tracking: You want to turn on Pixel tracking, and link it to the Pixel codes you installed on your landing page and thank you page, (and your website), so that Facebook identifies different types of activity
Lead form Ads
If you were creating a conversion, post engagement or video views Ad you would simply press the green confirm button at the bottom. However, as we are using a lead generation Ad as an example there is one more step before that.
Under Instant form go to New form + and complete the sections provided. Essentially you are filling in the information you would have created for a landing page. This is useful because if do not have funnel building software, or the right WordPress theme, this is still a great alternative.
As this post is getting really long, I’ll probably do another post going deeper into the creation of a lead form Ad specifically.
Conclusion
If you have read part 1 and part 2, you’ll realise that a lot of work is required to make sure you set up an Ad on Facebook. The first part is research and creative based. The second part is really a step-by-step process. Get to a stage where you can set up Ads confidently, and then focus on testing and reading the data to see what you need to focus on. Until next time my friends!


2 Comments
Comments are closed.