
How to successfully install a facebook pixel on WordPress
If you do not know how to successfully install a Facebook pixel on WordPress, then you need to read this article! Content without intention is crazy. In other words, you need to be able to track how well your content is performing over time. The way you do this is by using an analytics tool like the Facebook Pixel. You can also use Google Analytics to track activity, however, this article will focus on installing the Facebook pixel.
To get started you need a Facebook Business Account which is free to set up. Then you can access your Facebook Business account and go to the Pixel section where you can grab the base code and install it under the header of your website in WordPress. If you are not technical, you can use plugins to help you do this. Once complete, you should install the Chrome Extension “Pixel Helper” to see if it has successfully worked.
Why Facebook?
It is clear to see that many millennials are moving off of Facebook and onto other platforms. One reason for this is because millennials feel like it has lost authenticity. However, there are many who still scroll on its feed and still have active log-ins. Another reason why Facebook has been given a “new rep” is that it is flooded with Ads. In addition, Facebook makes it very hard for you to leave the platform. Despite all of this, Facebook is one of the best ways to advertise a product or service or generate leads. This is because it is cheaper than most platforms, and has developed enough information over the years to allow marketers to finely target their audience.
Facebook’s Data
Facebook has up to 5,000 bits of information on everyone who has used their platform. From age to occupation, to spending behaviour and eating habits. Of course, this has been fed by Facebook user activity and associations with third parties. You could argue we have allowed this to happen, but Facebook was really the first to truly conceive the social network. Facebook was founded in 2004, and since then it’s algorithm has been very smart at determining user activity and what people are likely to do. This is helped by marketers installing Facebook pixels onto their websites and gathering information.
How the pixel works
The Facebook Pixel is an analytics tool that allows you to track activity on your website. This is useful because you can succinctly see what type of traffic you get, what types of people come to your website and what content performs well. Remember those situations where you have gone to Asos, and then when you go on Facebook an Asos advert pops-up on the right-hand side. That’s the power of the Pixel. In this scenario, Asos has set up an Ad that retargets people who have visited their website. The Facebook Pixel feeds this information back to Facebook, which then informs your Ad dependent upon how the Ad was set up.
How to install the Pixel
To install the Facebook Pixel you need to go into your Facebook Business Account. Make sure you have one set up first before you proceed with any Facebook Ads. Here’s what you do:
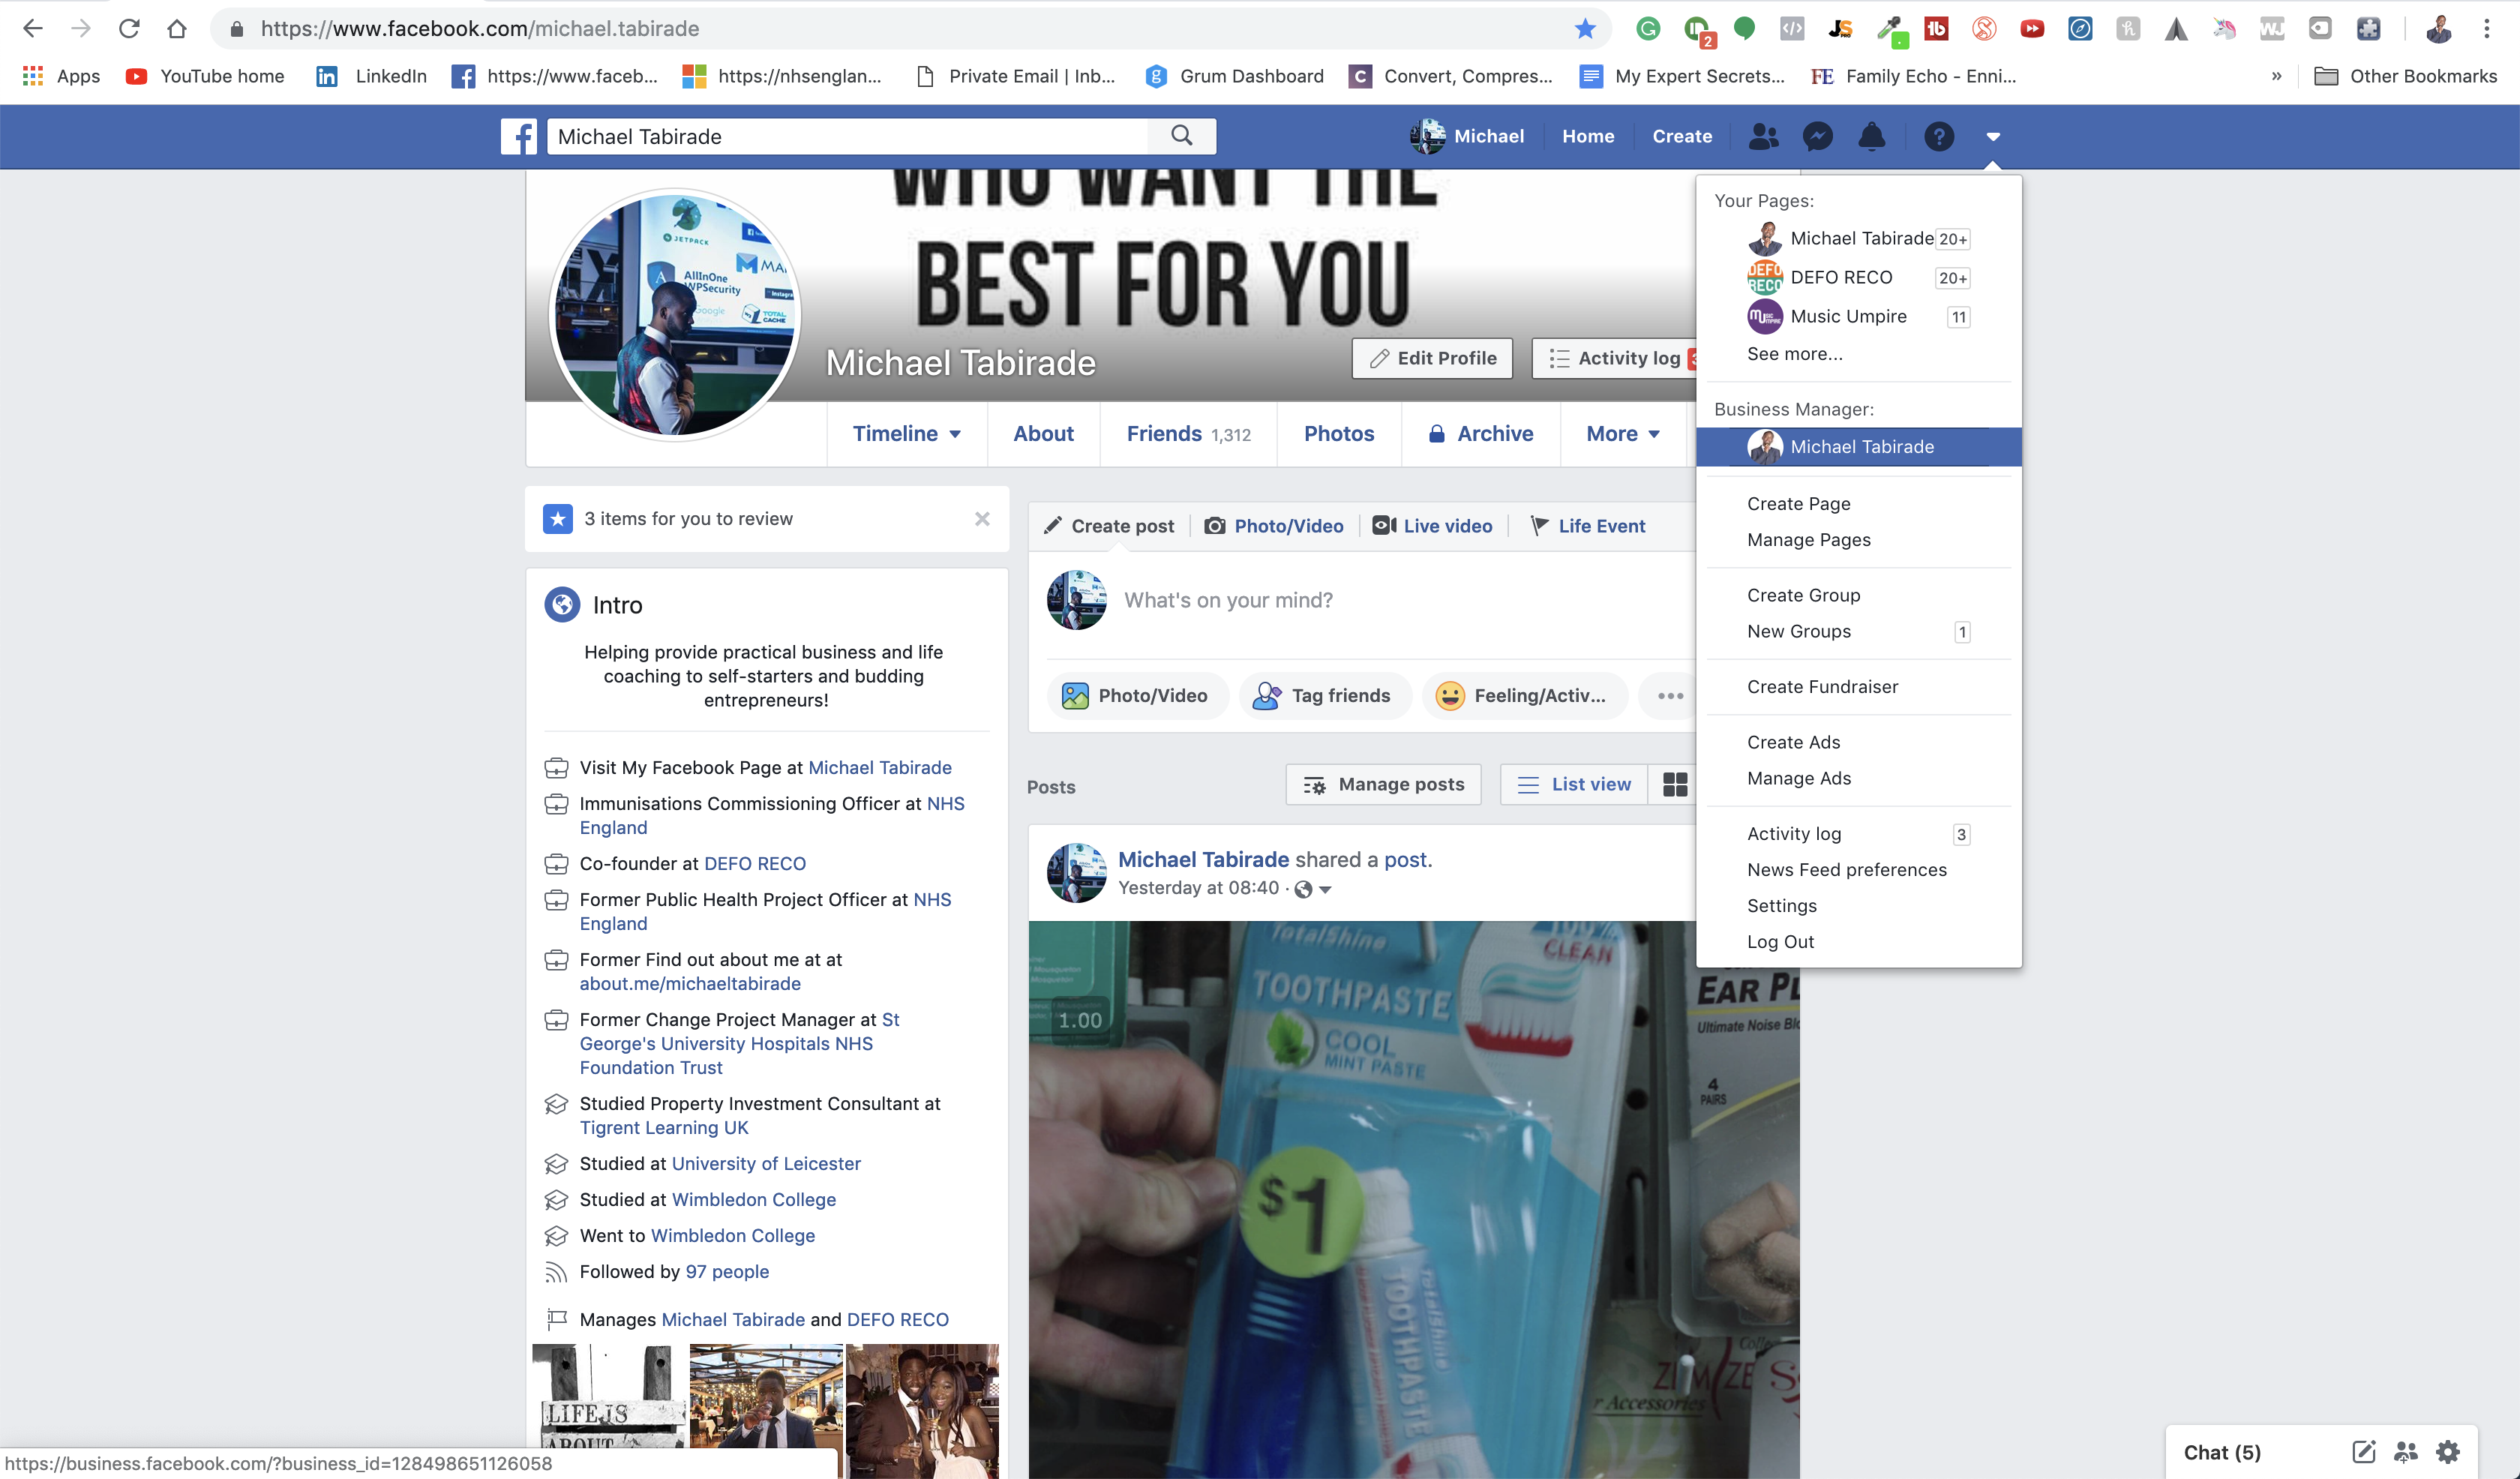
Go to your Facebook Profile and click on the dropbox arrowhead on the upper right-hand side, and select “Business Manager.”
Once complete, you’ll be taken to your business manager dashboard. Click on the menu button on the top left-hand side (three stacked horizontal lines) and select all tools> Pixels (under: measure & report).
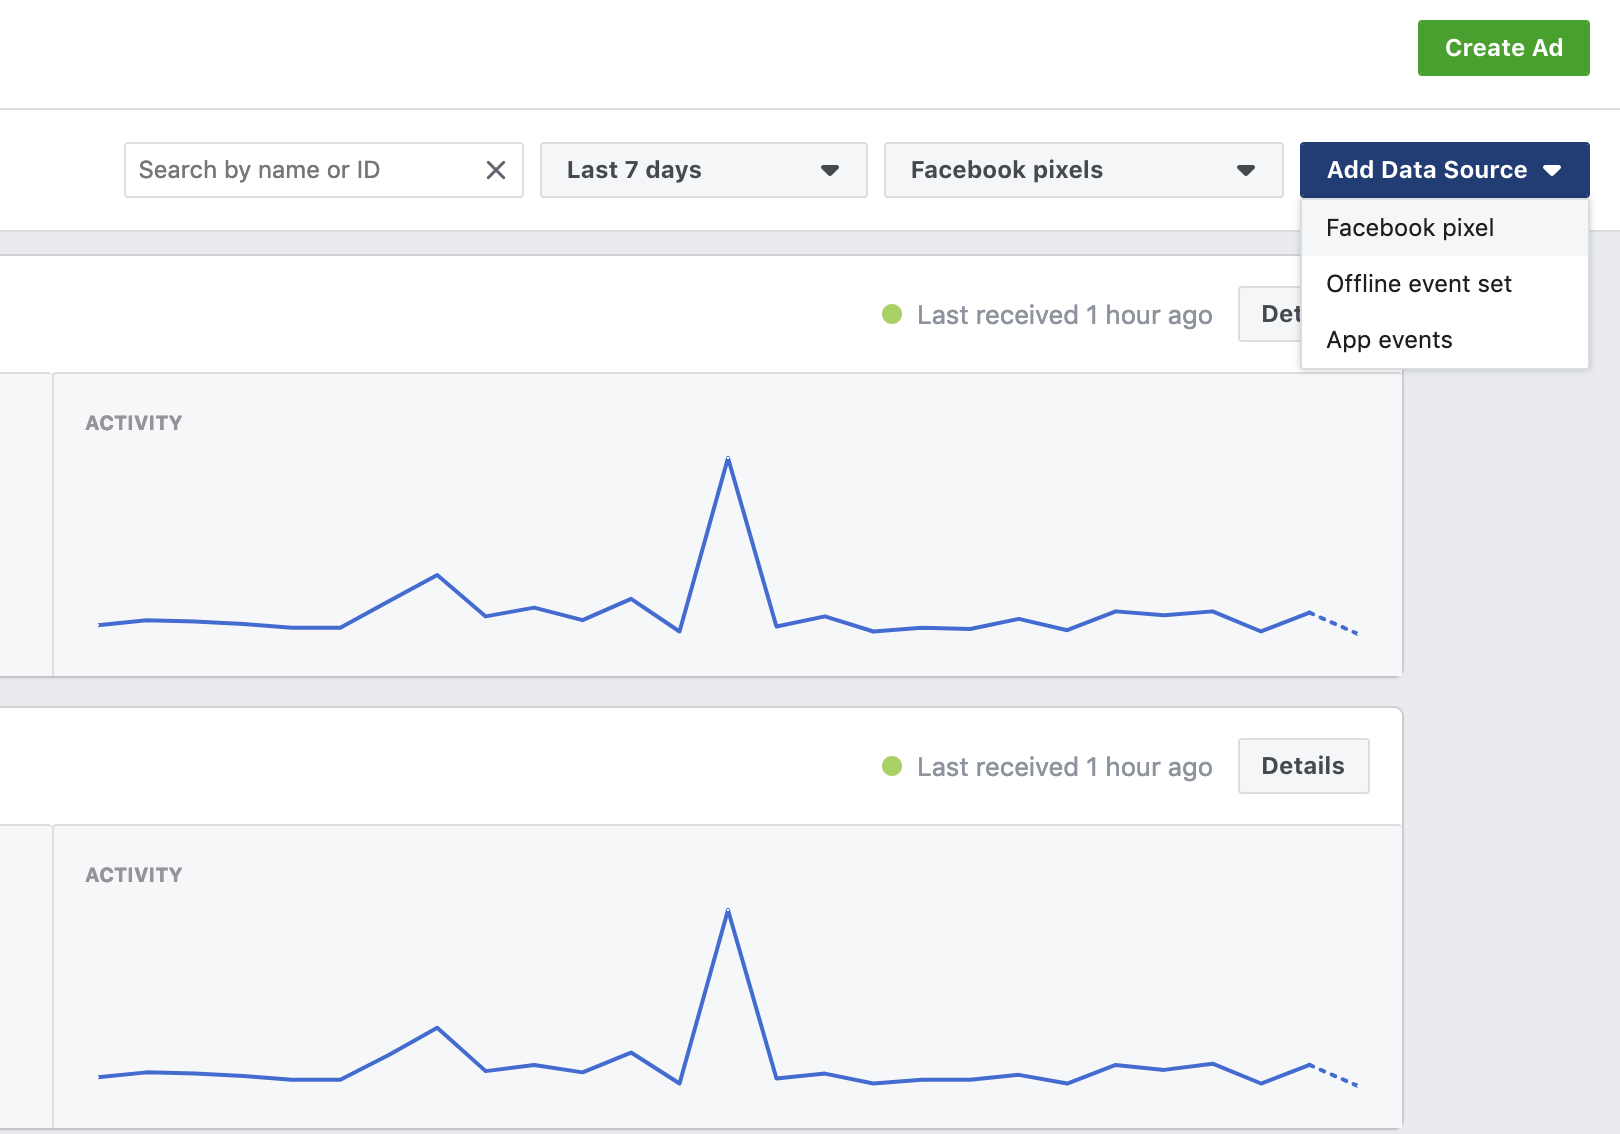
You’ll be taken to the Pixel page. On the right-hand side go to Add data soucre> Facebook Pixel
A new dialogue box will pop up, and you’ll want to name the pixel and add the website URL it is for example https://michaeltabirade.com.
Quick advice
Remember a pixel should only be created for the niche you are in. Let’s say you have different products and services related to the online marketing niche, it would be advisable to use one pixel for both brands, as they have the same or similar audiences.
Getting the Pixel code
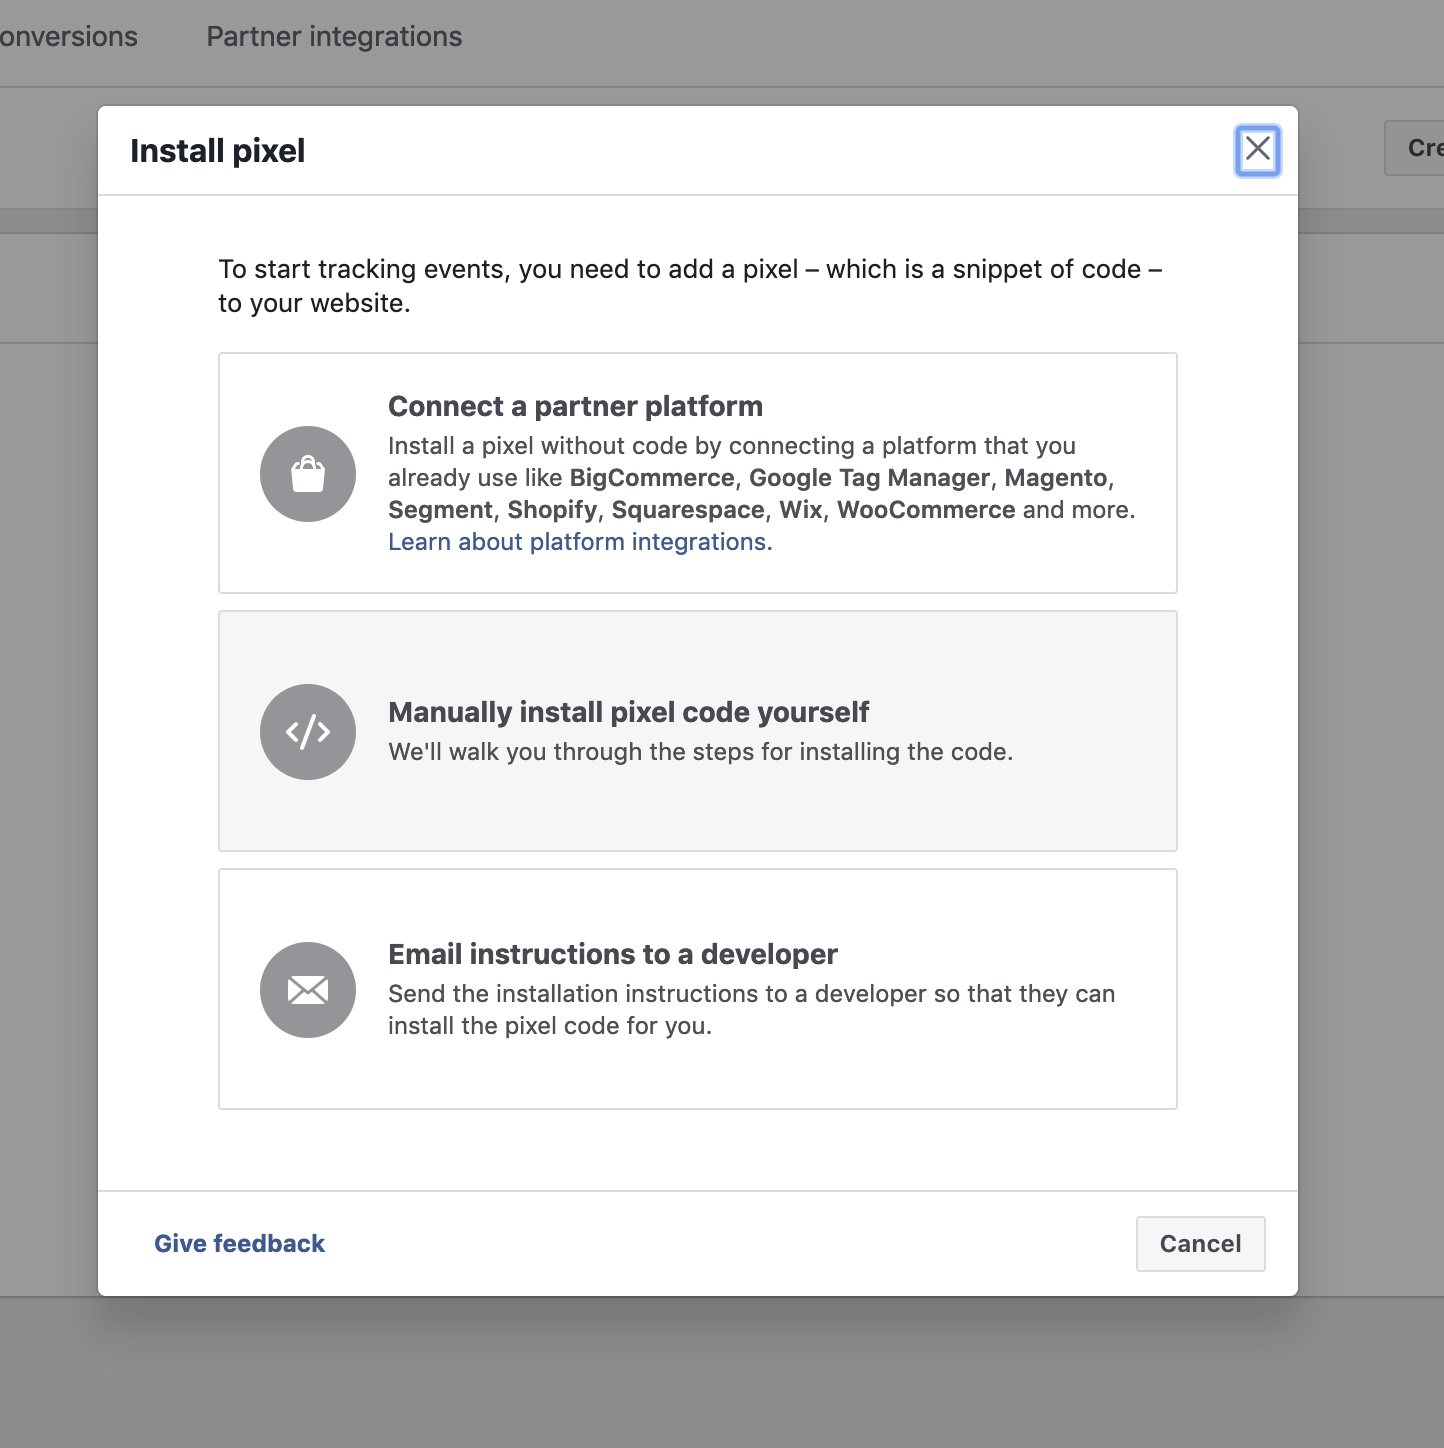
A new dialogue box will appear, where you have three different options to install the pixel code:
- Connect a partner platform
- Manually install pixel code yourself
- Email instruction to a developer
We will focus on Manually install pixel code yourself.
Another dialogue box will appear showing you your pixel code. On the 2nd instruction, it will tell you to copy and paste your pixel code onto your website. Click on the box with the pixel code in it, and it should automatically copy the code.

Your WordPress Website
Go back to your WordPress website and login onto your dashboard for example www.yourdomain.com/wp-admin. You can install your Pixel one of two ways. However, I’m going to show you the easiest way to do this. On the left-hand sidebar go to Plugins> Add New. In the search box look for the plugin “Insert Headers and Footers.” Once installed you’ll be taken to the Plugins page, where you should activate the plugin.
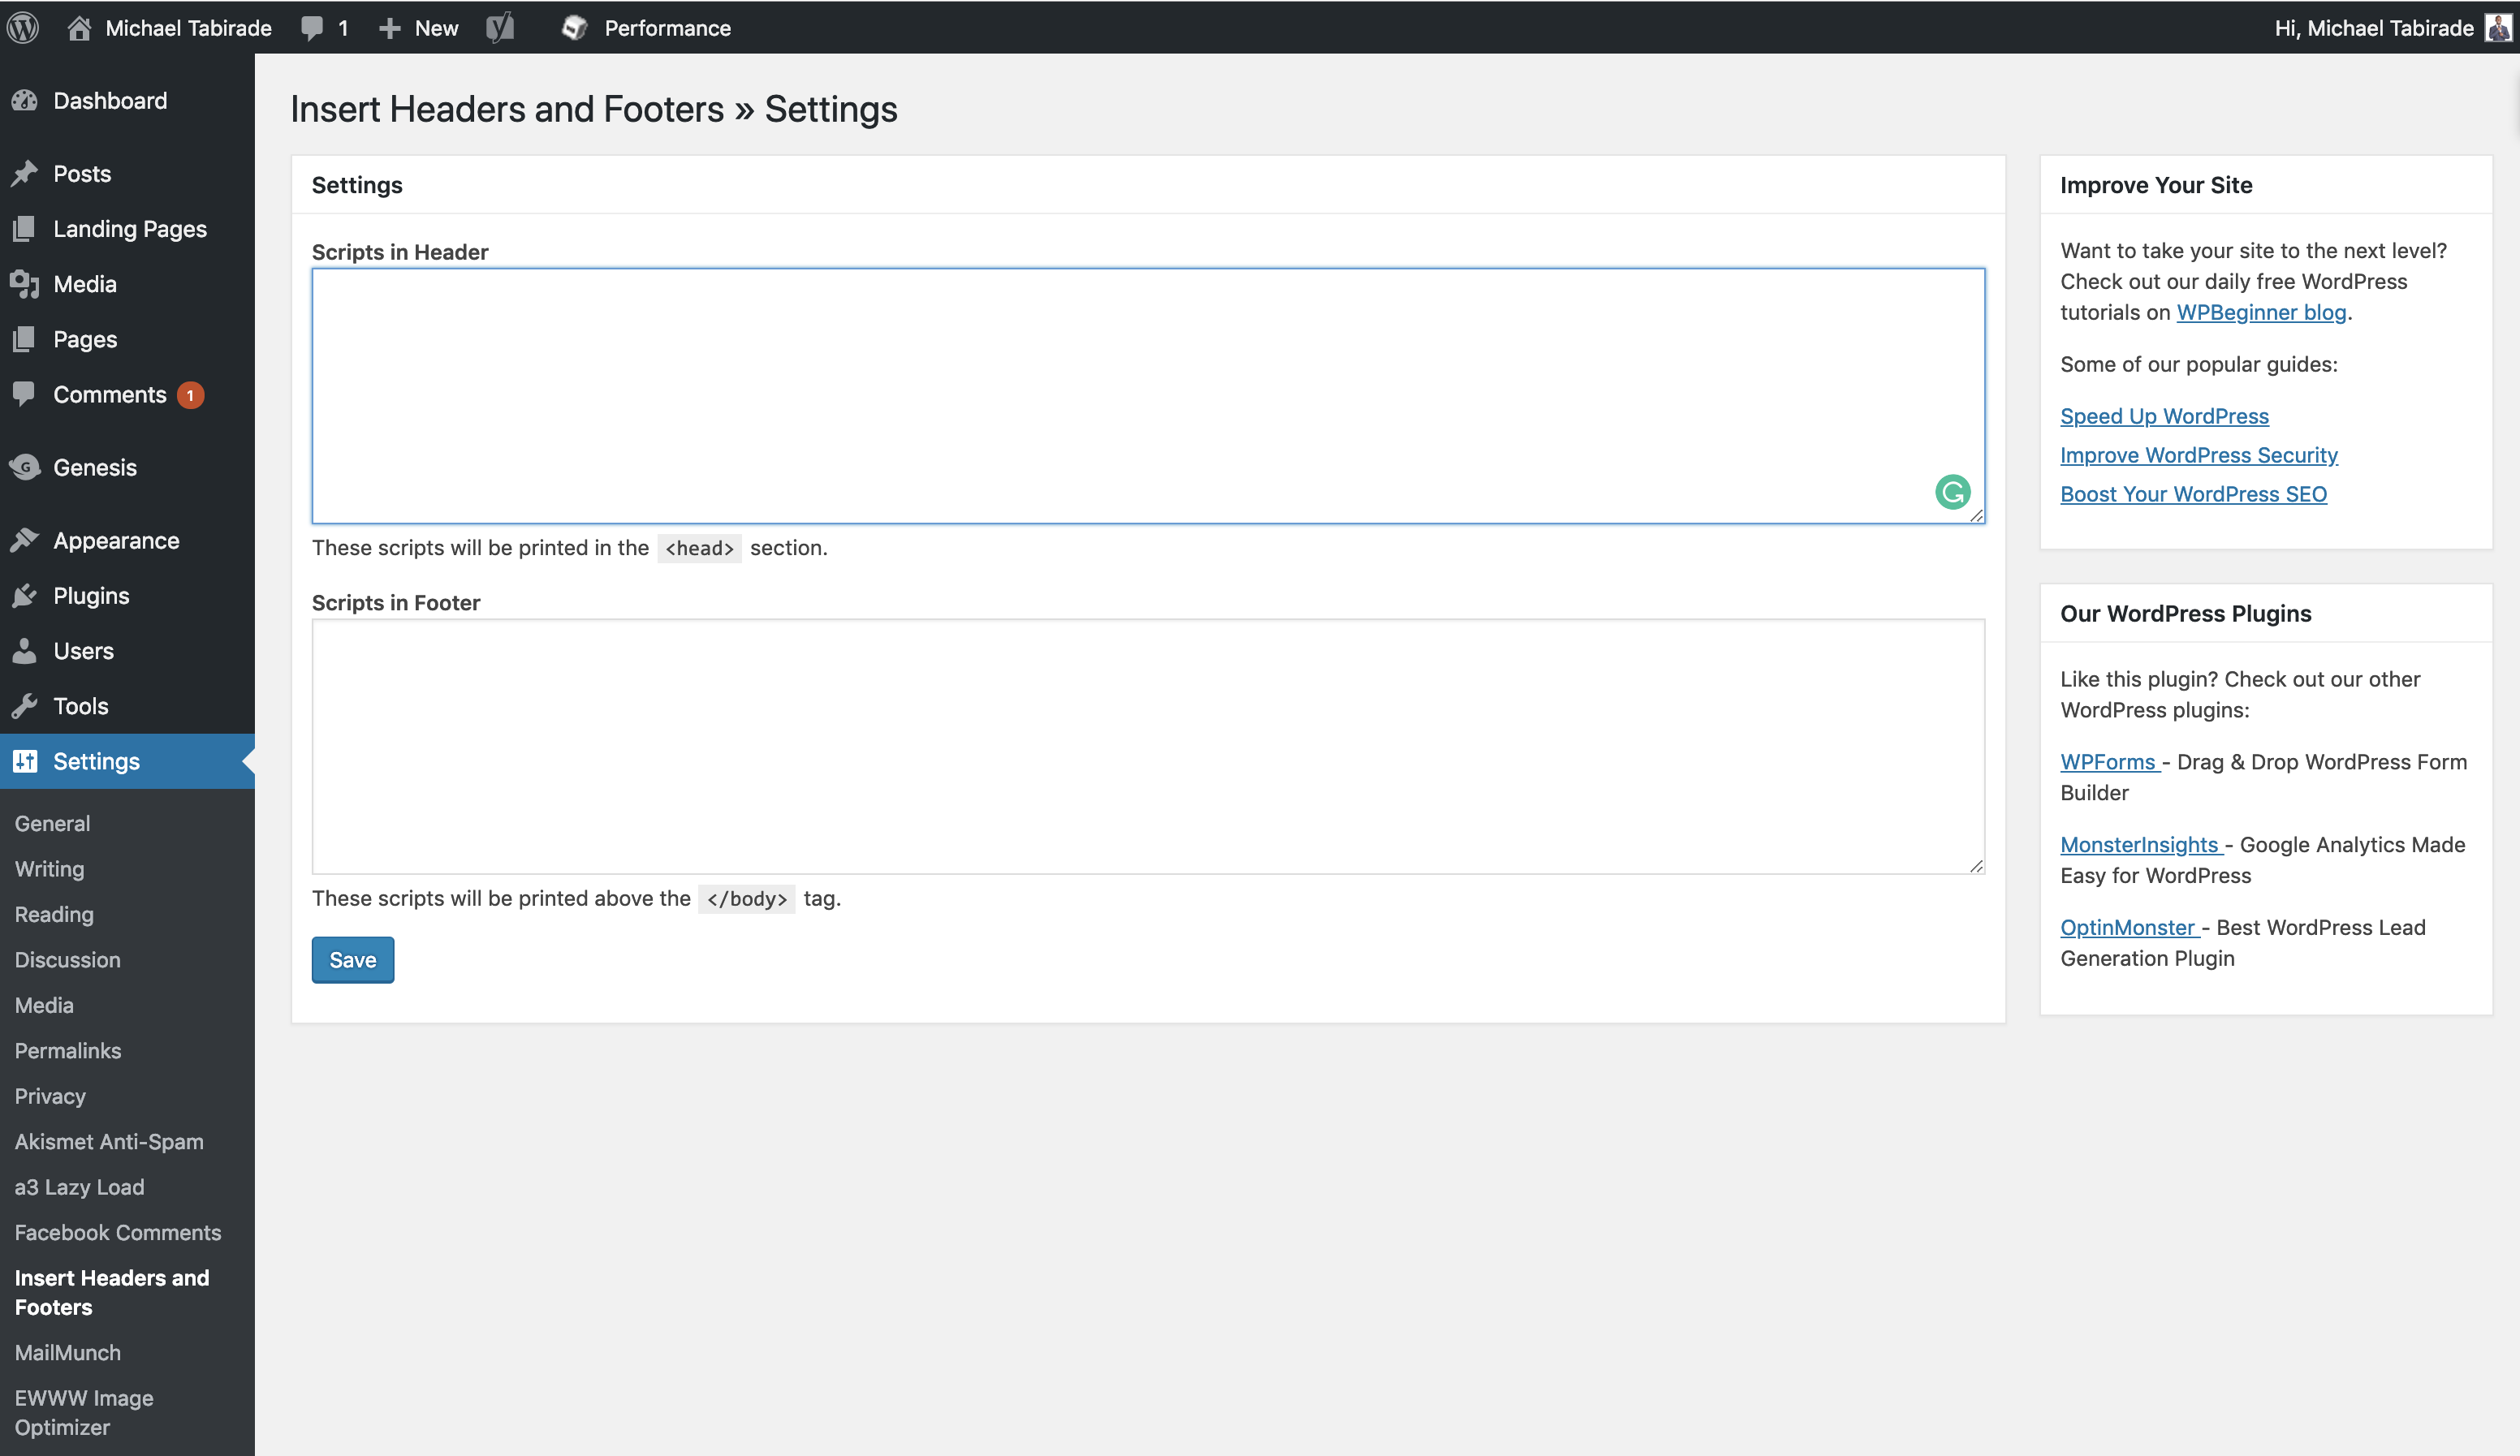
Then you need to go to the left-hand sidebar and select Settings> Insert Headers and Footers. Under the headers section, paste in the pixel code that you generate in your business account.
The Pixel Helper
Now, you need to be able to verify that you have installed the pixel correctly. In order to do this you need to do the following:
- Type into Google: “The Pixel Helper Chrome extension”
- Click on the first link
- Install the pixel onto Chrome
Verify your pixel
Once installed, go onto your website and check to see if your pixel is installed. In the beginning, there should only be one-pixel base code identified tracking two types of information PageView and Microdata.

This Pixel base code will be tracking activity globally on your website specifically for PageView and Microdata.
Pixels and Funnels
A funnel is a way of describing the user journey a prospect goes through in order to become a customer as seamlessly as possible. This requires the marketer to build landing pages, One-Time-Offer (OTO) pages, thank you pages, sales pages and check out pages. In order for you to know that people have performed a specific action, you need to use pixel event codes to track these events. You can find these codes on the dialogue box after you have copied the pixel code, or here.
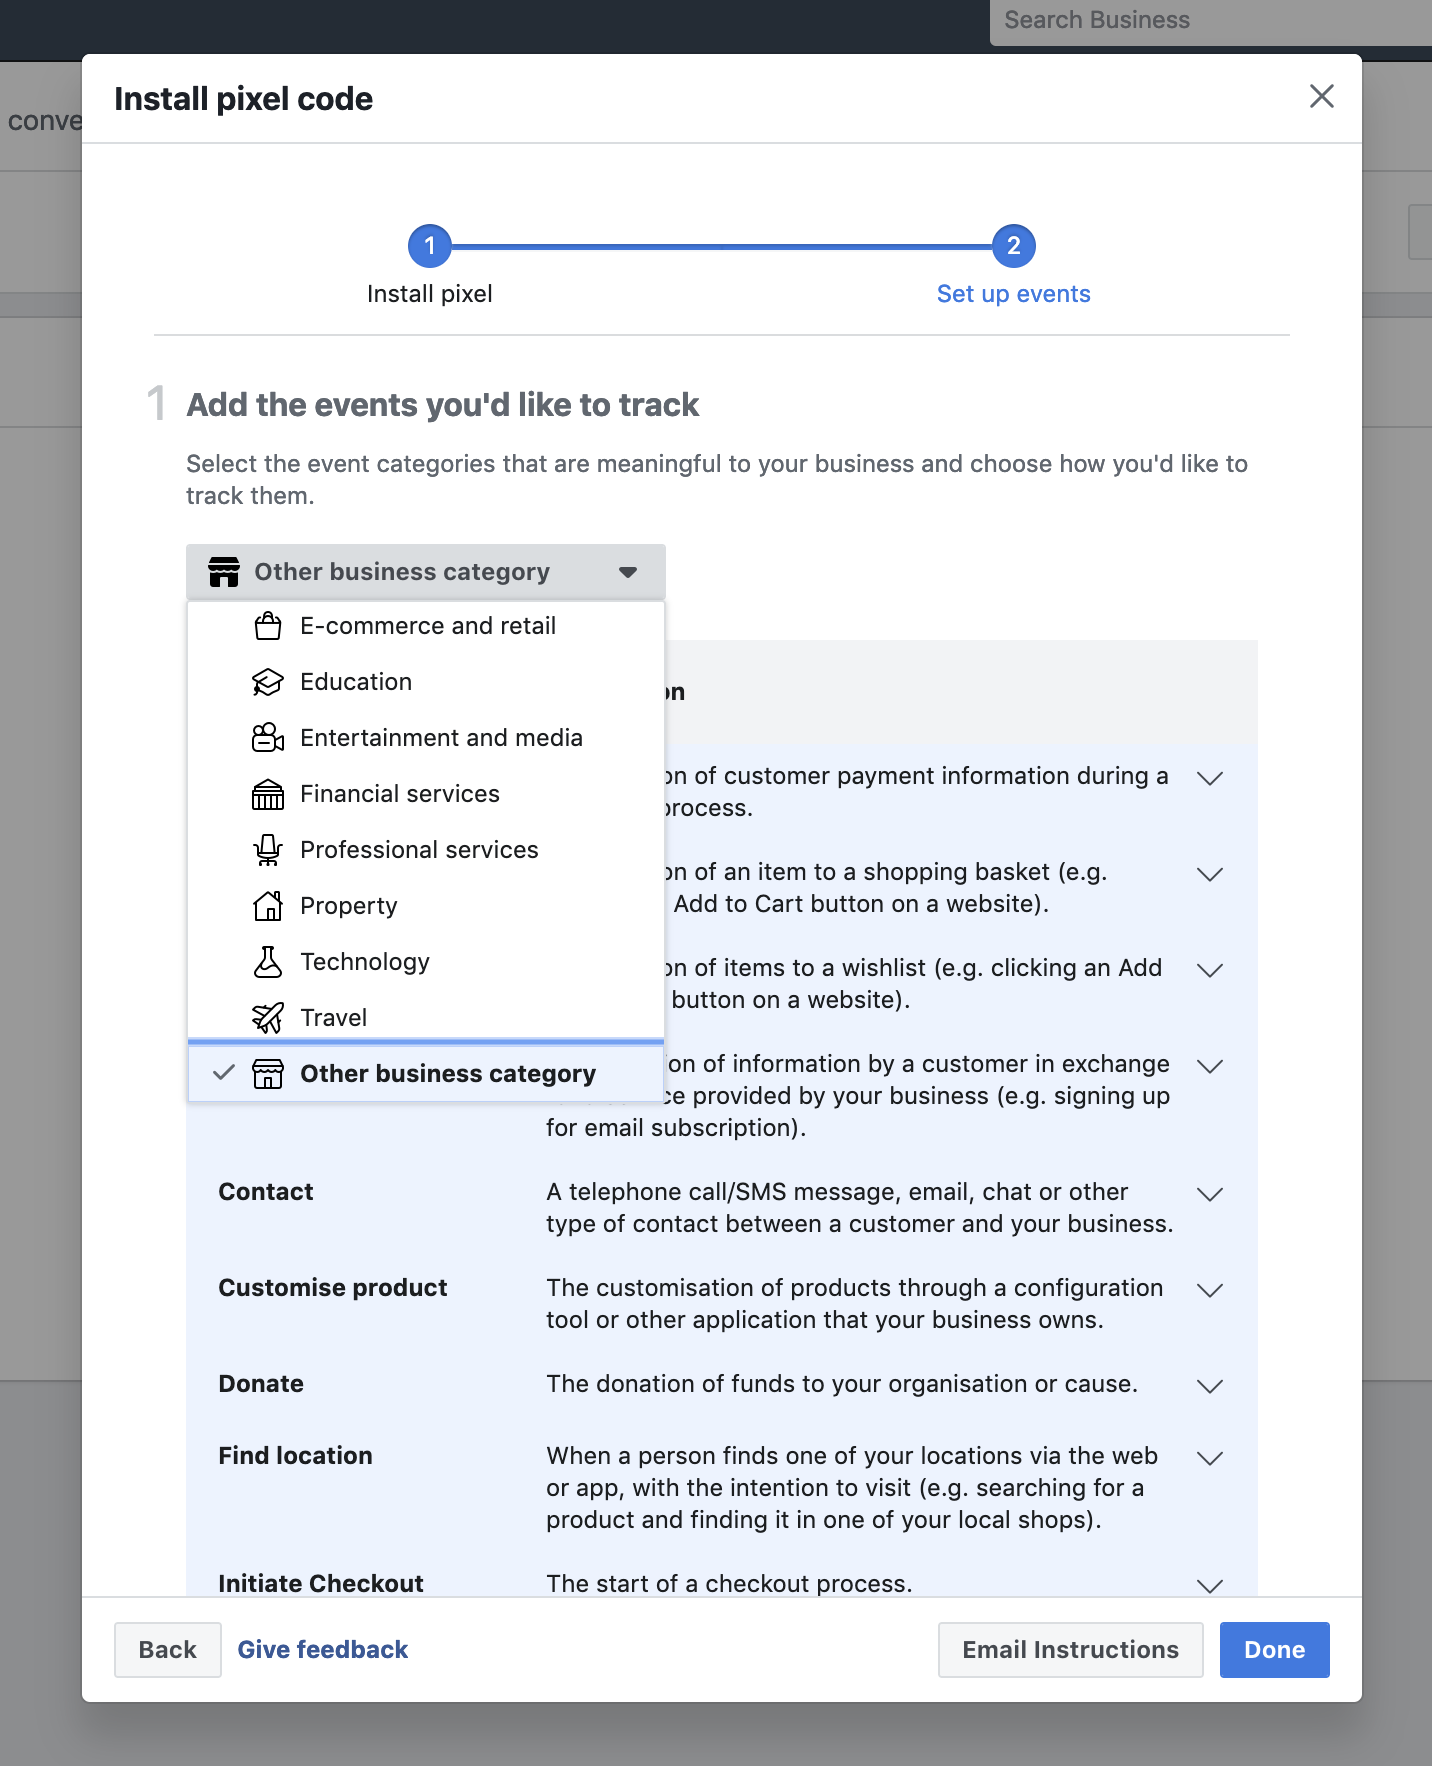
These codes are typically installed on pages that allow you to add analytic scripts to the header of that page. You can easily do this if you are using Leadpages, optimise press, Kyvio or ClickFunnels to build your landing page. You can also do this on WordPress but it is very dependent upon theme and plugins you are using.
What if I can’t add my base pixel code to the header of my website?
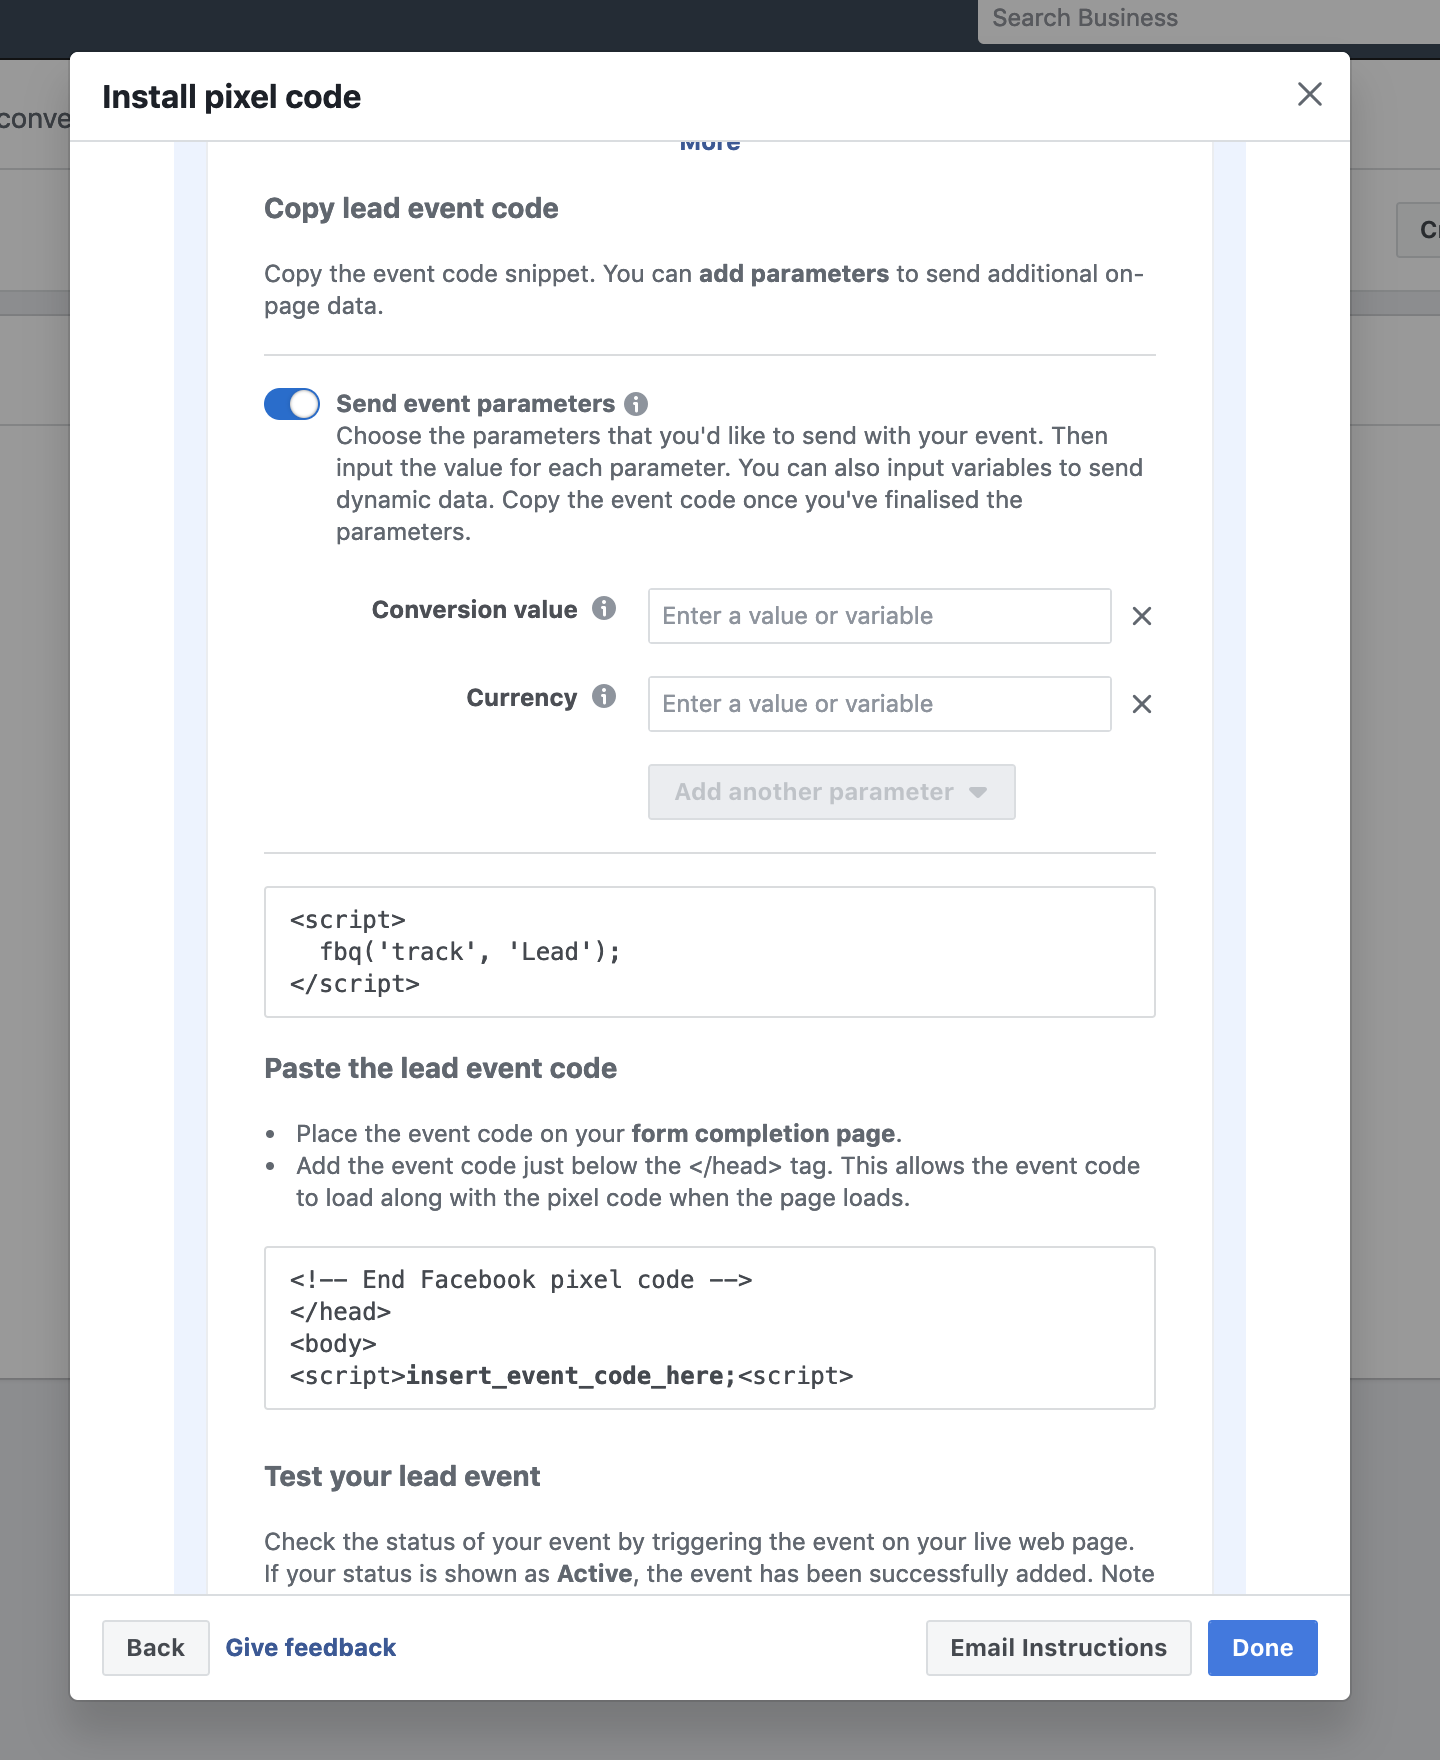
There are some instances where you can’t install the base pixel code to the header of your website. This usually happens when you are using a funnel builder like Kyvio. Well, you have to install it on every page you create including the right pixel event (for example Lead, AddToCart, View Content etc.). For example, if someone has opted in for your lead magnet, they should arrive at a thank page. That thank you page should signify that a new lead has been generated. You would need to have the base pixel code and lead event code installed in the script header of the website.
![]()
Facebook explains it well here and has a list of all pixel events you may need for your funnels.
Analytics
You have successfully installed your Pixel base code and over a few months you have developed free content on your website, and want to track your results. You have also done a few PPC traffic and engagement Ads on Facebook and want to be able to see the results. All you need to do is the following:
- Go to your Facebook Business Manager
- Click on the Menu Button
- Go to Analytics under Measure & Report
- Click on the Pixel name you created
- You should now be on a dashboard showing you an overview of your analytics
Please note: for paid Ads you can check results under the Ads Manager in your Business account.
What to look for
Don’t make it complicated! Check to see how your website is performing over time, and try to see what has influenced this. Have people organically come to your website? Are there specific types of content that perform really well? What countries, genders or age ranges are popular with your website? Do you get a lot of web traffic from mobile or desktop users? All of this will inform what you need to do going forward, and how you can increase the right sort of traffic going to your website. This information tied in with keyword research is very powerful!
Conclusion
It is important to know how well you are doing, otherwise, you’ll be blind to what works and what doesn’t. The plan of attack is very much dependent upon data and what story it tells you. If you haven’t already, install your pixel base code, and start tracking your results.


One Comment
Comments are closed.